


Nov
29
Mini Tree Skirt
Filed Under Quilting, Sewing | 3 Comments
After the last two tutorials for 5 pointed star blocks, I had all these blocks lying around. Ok, not really, I sort of planned it this way. I even chose the christmassy colors/fabrics on purpose. But I hadn’t planned on making a tree skirt until we decided that it wouldn’t be prudent to install the giant 7 foot tree in the living room this year. You know, what with the 1 year old with extra stretchy arms, and the over-abundance of furniture already busting out of the living room?

So last weekend — before they were all gone — Alexis and I went to Target and bought a little 4 foot tree to put on the end table between the sofas. Honestly, I was sure I would hate it and would be so disappointed and sad to not have my big tree out. One of the things I savor each year is putting my handmade tree skirt around the tree. But I thought that the big tree skirt might look good as a tablecloth/tree skirt this year.
Well, it looked ok, but the “presents” were all draped off the edges of the table, and so it was really just a white quilt around the base of the tree. That and I was terrified someone was going to set a glass of wine on it and knock it over (and by somebody I mean me).
So, like I said, I had all these red and green star blocks sitting around waiting to be turned into a table runner… so zing. The lightbulb went off.

My first problem was that the blocks from the two different tutorials were different sizes by 1/2 inch. So I decided to sash around the smaller ones. Of course, my quilty math was off, and I cut the sashing WAY too big for the tiny little 1/4 inch sashing I would need, but what’s the fun if there is no fabric waste, right?
So after that was done, I sewed up 9 of the blocks into a little mini quilt and quilted it by echoing each star shape about 1/4 inch on either side of the seam lines. I also stitched in the ditch around all of that skinny sashing. Let me tell you, I suck at SITD. I couldn’t stay on the seam line to save my life.
Anyway. After I had the whole thing quilted (and after I went to the LQS to find an appropriate solid color for binding) I decided that the quilt needed a border. Lucky for me I usually cut the back and the batting waaaay too big, so I just added some green strips to the edges by laying them face down on the finished top and sewing through all three layers and pressing them open. Ooooh… so that’s how quilt as you go works!! Gonna have to try a whole scrappy quilt doing that, but more on that later.

So after I added my impromptu border, it was time to make the slit in the tree skirt. It is so hard to take a pair of shears to a freshly quilted quilt, but I did it anyway. I have to keep telling myself that I have nothing to lose, really. Just some time and some fabric.

Then the binding. You can see on the center part that I didn’t cut the binding on the bias like I am supposed to. Yes, I’m lazy. But I actually did it on purpose this time. I knew it wouldn’t lie flat if I cut it on the grain, and it would sort of create a little turtleneck around the base of the tree. So, ugly as it is off the tree, I think it looks really nice when in use.

Now the trick is just going to be keeping the junk off the end table that usually accumulates there.
Check out Fabric Tuesdays on Quilt Story!
Nov
26
Last week I showed you one way to make a 5-pointed star quilt block. I also told you I would share the second technique I used when making the extra purple baby quilt.
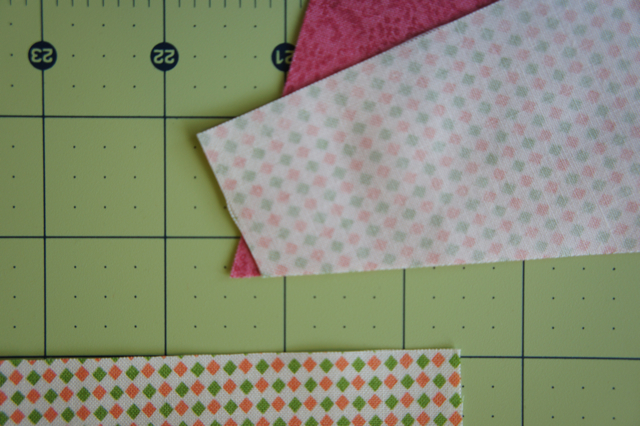
Again, I started with six 10″ squares of different fabrics. Keep in mind that you can use any number of fabrics in any size, but with six different fabrics I was able to set my stars up with 1 background fabric each and each of the 5 points was a different fabric. You could do this easily with 2 fabrics and they would be “opposites”.
The size of the starting squares should be about 2″ bigger than your desired finished size. But that also depends on how neatly you manage to line up edges (i.e. how much or little you end up trimming off each sewn section).
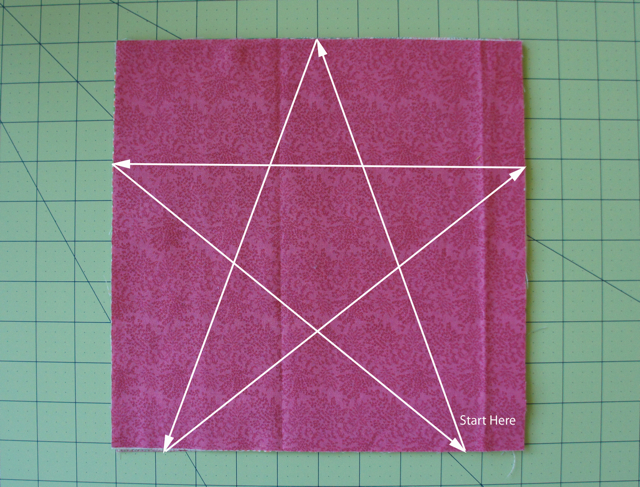
So, starting with your stack of fabrics, use your ruler and rotary cutter to cut a star through the stack as if you were drawing it on paper.
You should end up with 11 stacks of star pieces…
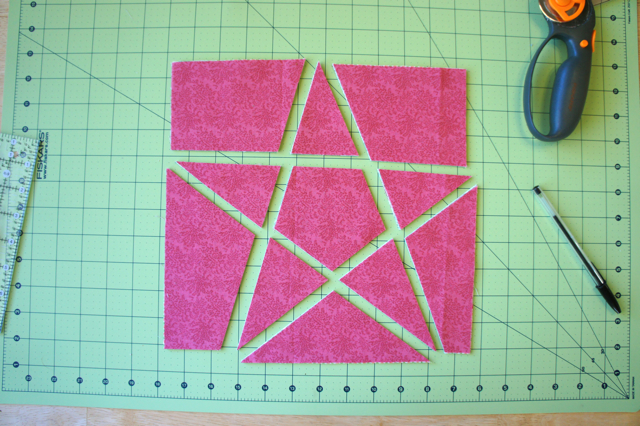
Which you can then order in any way you please.
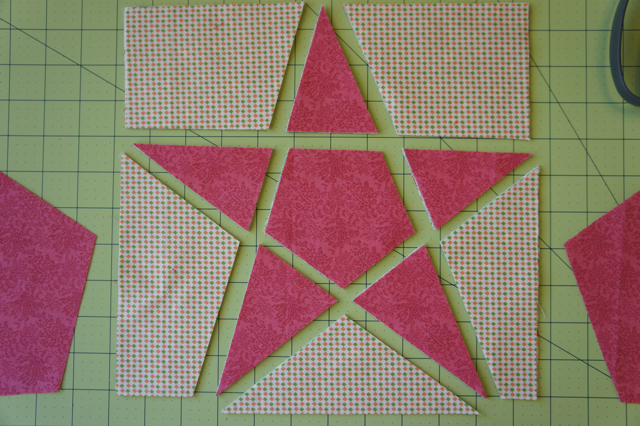
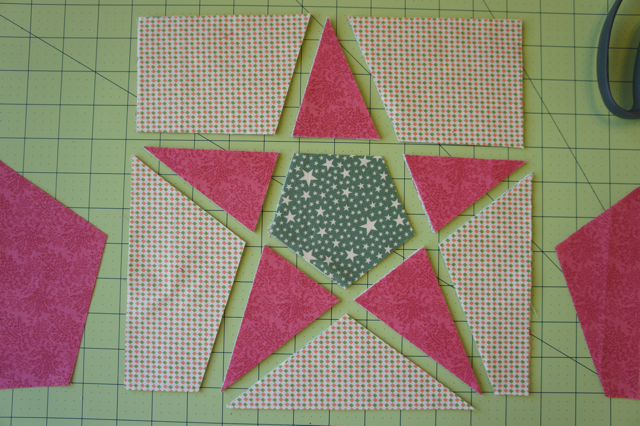
I chose to use a single background fabric and a different fabric for each point. To do this simply “rotate” the fabrics in each point. On the top point take the top fabric and move it to the bottom, then going clockwise, take the top 2 fabrics from the next point and move them to the bottom. Then the top 3 on the next point, and so on.
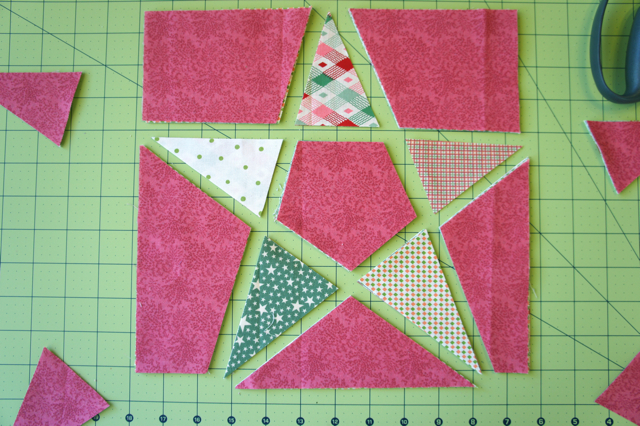
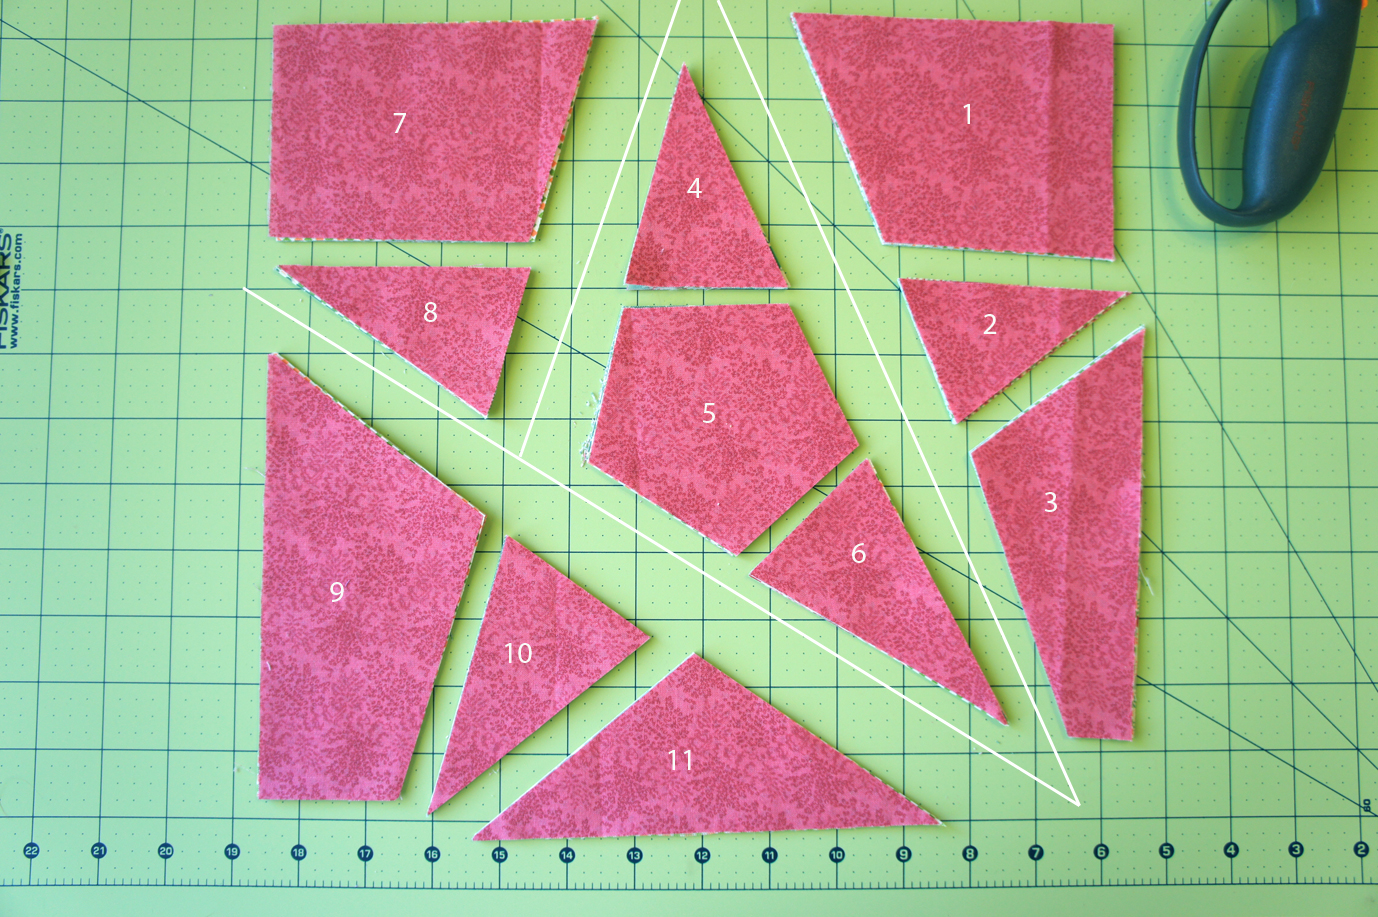
Below illustrates the order the pieces will be sewn together.
Note: Be sure that when you are sewing a “point” to a background fabric that you overlap it by about a 1/4″ on the “inside” so that the edges you’ll be sewing together later will require less trimming.
Except: when sewing the points (pieces 4 and 6) to the center piece (piece 5), line up the edges exactly so the point will be centered on the middle piece. There is no way to avoid trimming the center.
Sew pieces 1, 2 and 3 to each other, then pieces 4, 5, and 6 together, then 7 and 8 and finally 9, 10 and 11.
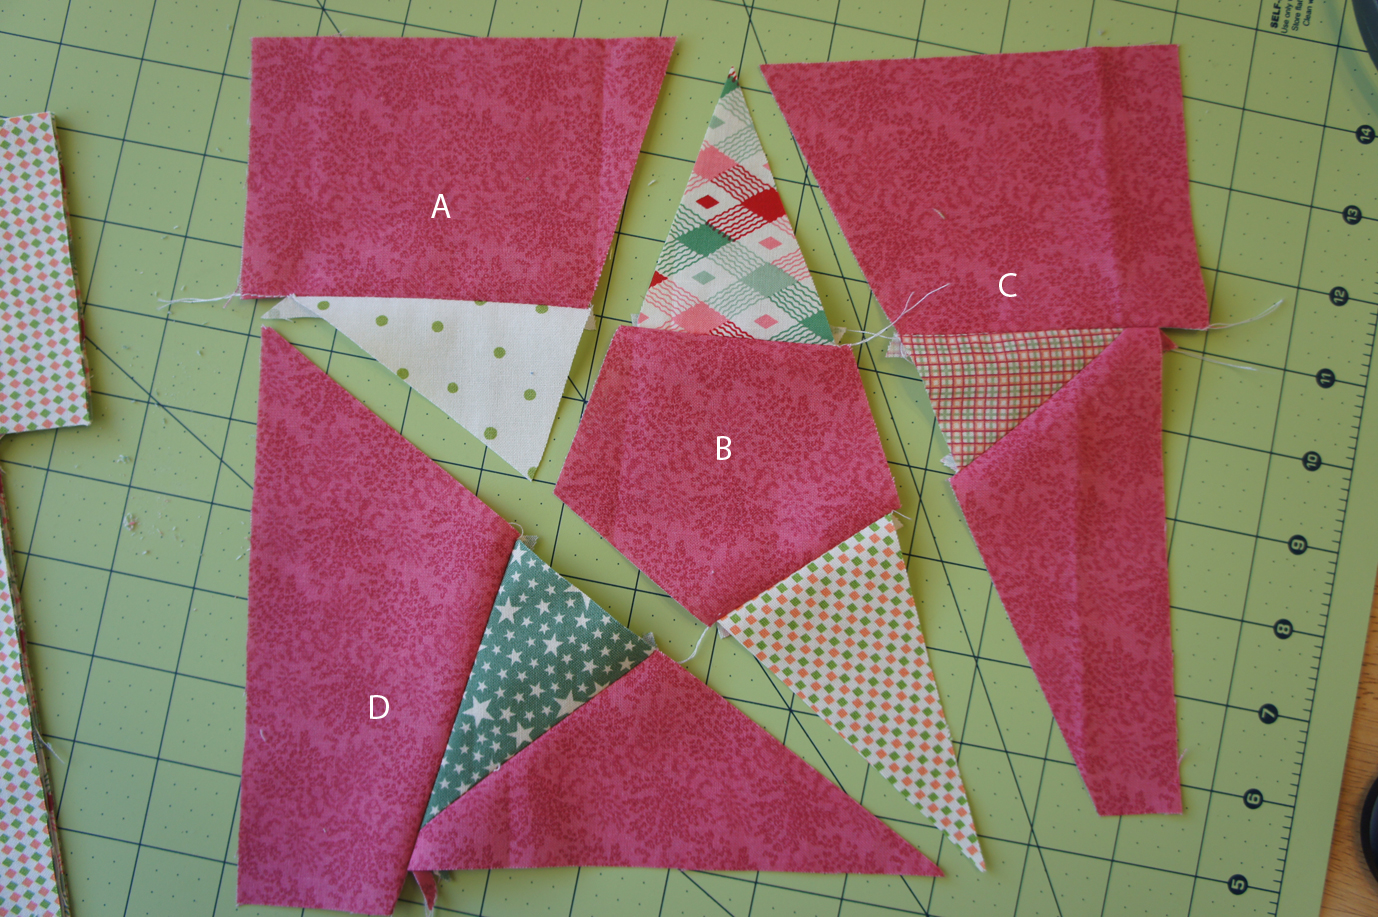
Next take piece B and trim the edge that abuts piece A. You’ll be removing part of the center pentagon. (Note that my piece is “upside-down” in this picture so I could more easily trim it from the right since I am right handed.)
If piece A does not have a straight edge give it a little trim too.
Now sew these two pieces together. (We will call this piece AB from here out.)
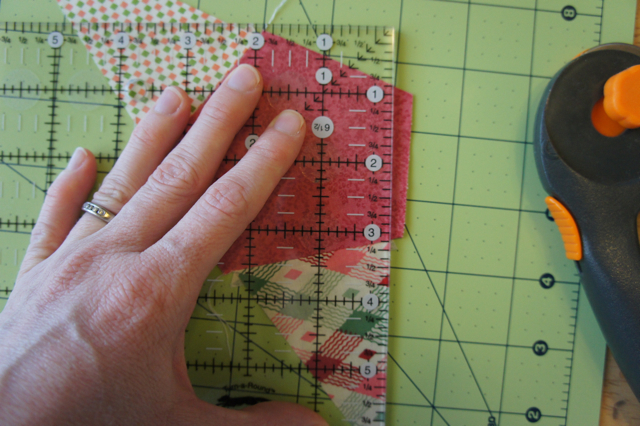
Now trim piece AB on the edge that abuts piece C, and piece C along the same side, if necessary.
And sew AB to C, making what we’ll call piece ABC.

Trim ABC (mine’s upside down again for handedness purposes) along the (last!) side abutting piece D. By this time you will most certainly have dog ears to trim if nothing else.
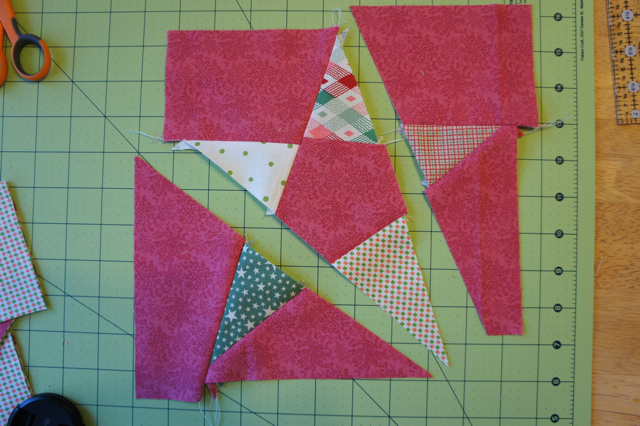
Again, trim piece D if it needs it. Mine actually came out pretty straight, so I didn’t trim it. Sew ABC to piece D and….

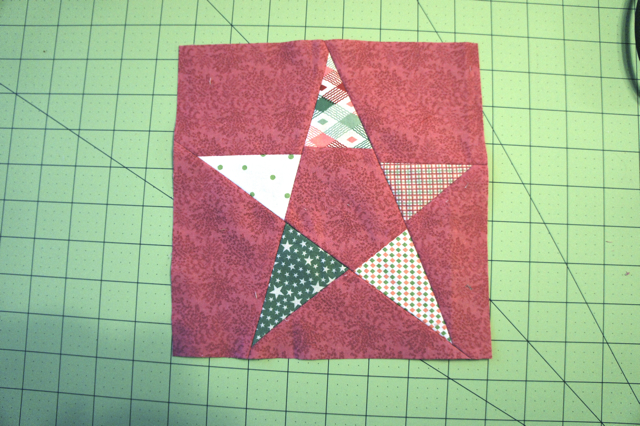
You are almost done!
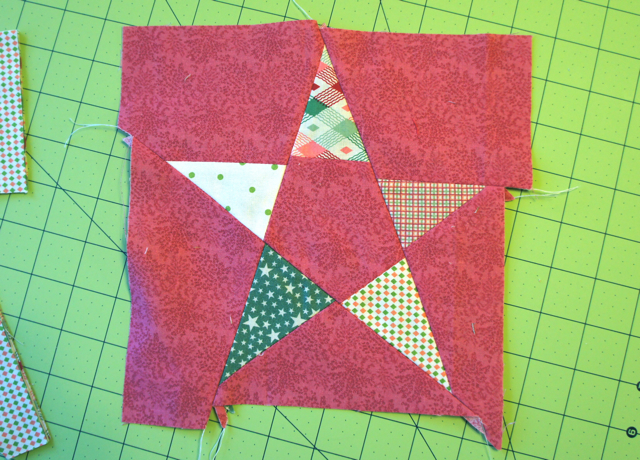
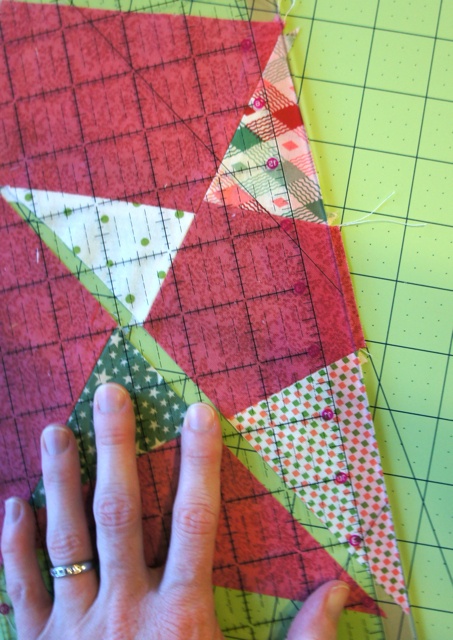
Trim the block square, being sure to leave at least 1/4″ from the tip of each point. My finished blocks ended up at 8″ with just over 1/4″ from the tip of each point.
As I said in the stack n whack tutorial, there are pros and cons to each technique. Here’s a little recap so you can choose the method you think will work best for you.
Pros
After cutting, one block can be made at a time
More control over the layout of each fabric in every block
Slightly larger blocks
Cons
Lots of little pieces to keep track of
10 seams (vs 5) for each block
Each point is closer to the edge of the block
Another thing to note is that these stars automatically come out a bit wonkier because of the way the points intersect the center piece. That may or may not be a con in your book.
Remember that I would love to see your projects if you use this or the other tutorial.
Happy Sewing!
Nov
17
Way, way, way back I showed you a baby quilt made from wonky star blocks. I said in that post that I would someday do a tutorial on how the blocks were made. I also mentioned that I ended up using two different techniques in the blocks for that quilt. So here is the first one, and I’ll post the second way in another post.
There are pros and cons to each way, so decide for yourself which way will work best for your quilt.
This is what I call “stack ‘n’ whack”. I’m not sure if this is actually what stack ‘n’ whack is, but to me it fits. So here goes.
I started with six 10″ square pieces of fabric. Though you can start with any size, and really any number of fabrics, but 6 offered a good variety in the finished product. Any more and you would probably have some fabrics that did not show up in every block, but that would be ok, too. Just remember that the finished squares will end up quite a bit smaller than what you start with. I started with 10″ blocks and ended up with 7.5″ blocks (though I could have trimmed them to 8″).

As you’re stacking your squares before cutting, make sure that if you have any directional prints that you have them in the orientation you want them to end up in in the final star (ie, right side up!). I had this diamond pattern that would work either way, but I wanted it “longways”.

I also made tiny labels with the letters A-G so that I could keep my blocks in order (very important!) as I was sewing them together. I just stuck each label in the very center of the blocks before I started cutting. (That will end up being the center of the star, so no worries about cutting through it).

Ok, are you ready to start cutting? Because, there is no measuring or anything going on here. You just have to have the guts to cut with abandon! Lay your ruler across the fabric stack as shown below and give it a cut with your rotary cutter.

Next, take the top fabric from the unlabeled stack and place it on the bottom of that stack. Always restack the unlabeled stack throughout the process.

Now you’re going to sew these pieces all back together using a 1/4″ seam allowance. Make sure the pointy edges overlap the straight edges on each end by 1/4″ so that the edges of the block actually line up.
Sew a 1/4″ seam. I chain pieced all 6 of my blocks just because I loathe starting and stopping the machine.

Press your seam and you have the block below. I pressed mine open because I think it makes things a little less bulky when we get down to seam numbers 4 and 5.
Restack your blocks in the correct order. After every seam restack your blocks according to your labels. If you don’t do that, I can’t guarantee that you won’t end up with the same fabric side by side in adjoining sections of the block.

Still with me? Ok, cut number 2. I swear this will start looking like a star soon. Lay your ruler as below being sure to overlap the first seam at the top by about 1″. If you don’t do that, when you go to sew your final blocks together, the points will be in the seam allowance and will get chopped off.

This time, take the top two fabrics from the unlabeled stack and put them at the bottom of the pile.


Now sew them together the same way as the first set. Be sure to overlap the points on each end so that the edges line up.
Press. Restack.

Again, line the ruler up as shown below for cut number 3. Make sure that the ruler is overlapping by about 1″ on the “point edge” (in this case at the bottom). Cut. Aren’t you glad you have a rotary cutter?

Take the top three fabrics in the stack and move them to the bottom of the pile. Are you sensing a pattern here yet?

Again, sew. Make sure that the seams in the middle are overlapping by 1/4″ or so. This will throw the edges out of whack, but it makes the edges of the star’s point line up with its center.

Press. Restack.
As you can see, I didn’t have mine at a perfect 1/4″. The seams don’t line up perfectly. That’s ok with me. This method does not result in perfect stars. In fact, you can easily force it to be rather wonky just by changing the angle of the ruler on each cut.
You can also see on the lower left corner how out of whack the edges of the block got. Don’t worry about that, it will be taken care of by trimming at the end. But do try to keep the “out of whack-ness” in the same place on each block so that stacking is easier.

Alright. Make cut number 4 as shown below. This is the only cut that doesn’t end up on the bias. Again, make sure the ruler is overlapping the last seam by at least 1″.
Take the top four fabrics from the unlabeled stack and move them to the bottom of that pile. I know you guessed that before you had to read it didn’t you?

Can you guess what the next step is? Yeah. Sew them together. This time, line up the seams in the center with each other. There is no way to make them overlap on each side, and if you try one side the point will be off the center by about a half inch. The point itself is going to end up slightly narrower than the center.

Press. Restack.

Starting to look like a star now! And we’re almost done. One last seam to go.
Lay the ruler across your stack and this time make sure that the seams at both ends are overlapped by about 1″. Cut. Now take the top five fabrics from the — yep you guessed it — unlabeled stack and move them to the bottom of the pile. Yes, this is the same as moving the bottom fabric to the top of the pile. So do it however you want to… :)

And sew. Again, making sure to align the seams in the center. Press and you have your almost finished blocks. All that is left is to remove all the raggedy edges and square up the blocks.

You’re going to want to trim enough off to remove the little bits of overlapped seams around the edges, or at least only present in the seam allowance so that they don’t show up in your finished quilt. Or maybe you don’t care… in that case just trim it up square.
Be sure to trim each block individually. They are all similar, but not identical and you don’t want to accidentally cut off points.
I chose to cut my blocks to 7.5″ because that’s how big my square ruler is. They easily could have been cut to 8″ or maybe even 8.5″ if I didn’t mind the little bits around the edges showing. Just make sure that there is at least a 1/4″ past the end of each point so that you don’t chop them off when sewing your blocks together.

So here they are! I think I’m going to use them (along with the blocks produced from the tutorial for the 2nd technique) to make a Christmasy table runner.

Remember I said that there are pros and cons to each technique. Here’s a little summary for this technique.
Pros
Not a whole bunch of tiny pieces to keep track of.
Random layout of fabrics in each block.
Only five seams per block.
Cons
Not a whole lot of control on how the fabrics are laid out for each block.
All blocks have to be sewn at the same time.
Finished blocks are smaller with this technique.
So what do you think? Clear as mud? I’d love to see your blocks if you decide to give this a go!

Nov
16
Work in Progress Wednesday
Filed Under Parenting, Quilting, Sewing | Leave a Comment
Nothing more than a quick update on Alexis’ quilt. Gads and Gads of 4.5″ HSTs. And still no idea how I’m going to lay them out. Anyone have any suggestions?


Nov
14
Stockings for Kids
Filed Under Giving, Quilting, Sewing | Leave a Comment
I was going through my (not that big, but still too much to comfortably store in my way over crowded house) stash when I came across the fabric leftovers from when I made the kids’ stockings. (The whole story of the stockings is perhaps a very long story for another time.) I was going to just donate it or throw it out (as some of the fabric was as old as Alexis), but then I came across this post on Faith’s blog. I know, I know, it seems like all of my intel comes from her blog. I think I might be completely clueless in the awesome quilty blog-o-sphere if it weren’t for her.
So anyway, I obviously knew what I needed to do. So here they are. Two stockings for the Stockings for Kids — a very worthy cause that provides (stuffed) stockings to foster kids. Quick to whip up and cute to boot.

The stockings are made from a template I created from Chris’ and my stockings (both store bought) years ago when I first made Alexis’ stocking. Oddly enough, when I went to cut the second stocking out, I realized I must have inadvertently thrown away the paper template that I had saved for over nine years… So I had to recreate my pattern from the first piece I’d cut out.
There are two differences from the stockings I made for my kids and these. The first is that the quilting is just horizontal(-ish) lines instead of a criss cross pattern. I actually like this quilting much better. Or maybe I just like that it is quilted in half the time…. Ok, not really. The only thing I’m not sure about is the tracks across poor Santa’s face. It looks like he’s been run over by a freight train or something.

The second thing is that these are actually lined. I did not line the ones for Alexis and Sean because Chris’ and my stockings are not lined. I really don’t think it was necessary, I’ve never had any trouble with the stocking stuffers catching on the batting, but the lining does add a nice weight to the finished stocking. And I had these two adorable green prints that have been in my stash forever.

The only thing that bothers me a teensy bit, is that the stocking on the right has two different thread colors for the quilting. I didn’t want to use red thread on the front of a very bluish fabric scene. Do you think it’s too obvious?