


Nov
26
Last week I showed you one way to make a 5-pointed star quilt block. I also told you I would share the second technique I used when making the extra purple baby quilt.
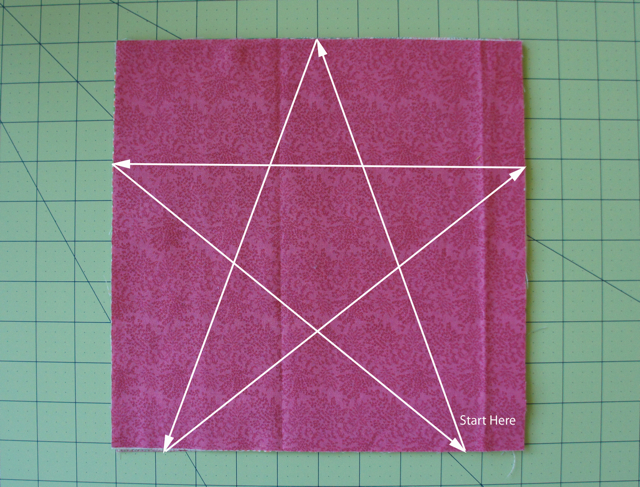
Again, I started with six 10″ squares of different fabrics. Keep in mind that you can use any number of fabrics in any size, but with six different fabrics I was able to set my stars up with 1 background fabric each and each of the 5 points was a different fabric. You could do this easily with 2 fabrics and they would be “opposites”.
The size of the starting squares should be about 2″ bigger than your desired finished size. But that also depends on how neatly you manage to line up edges (i.e. how much or little you end up trimming off each sewn section).
So, starting with your stack of fabrics, use your ruler and rotary cutter to cut a star through the stack as if you were drawing it on paper.
You should end up with 11 stacks of star pieces…
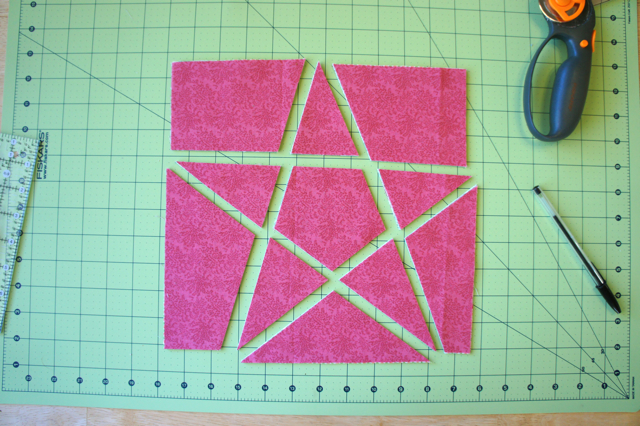
Which you can then order in any way you please.
I chose to use a single background fabric and a different fabric for each point. To do this simply “rotate” the fabrics in each point. On the top point take the top fabric and move it to the bottom, then going clockwise, take the top 2 fabrics from the next point and move them to the bottom. Then the top 3 on the next point, and so on.
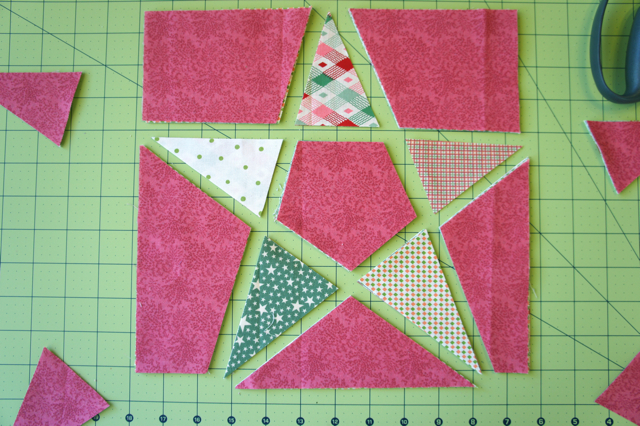
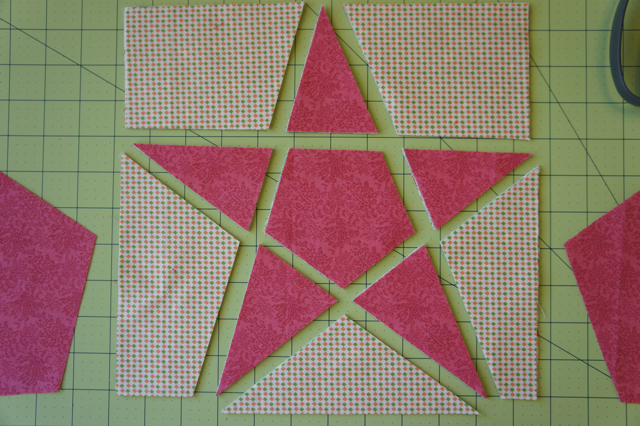
Below illustrates the order the pieces will be sewn together.
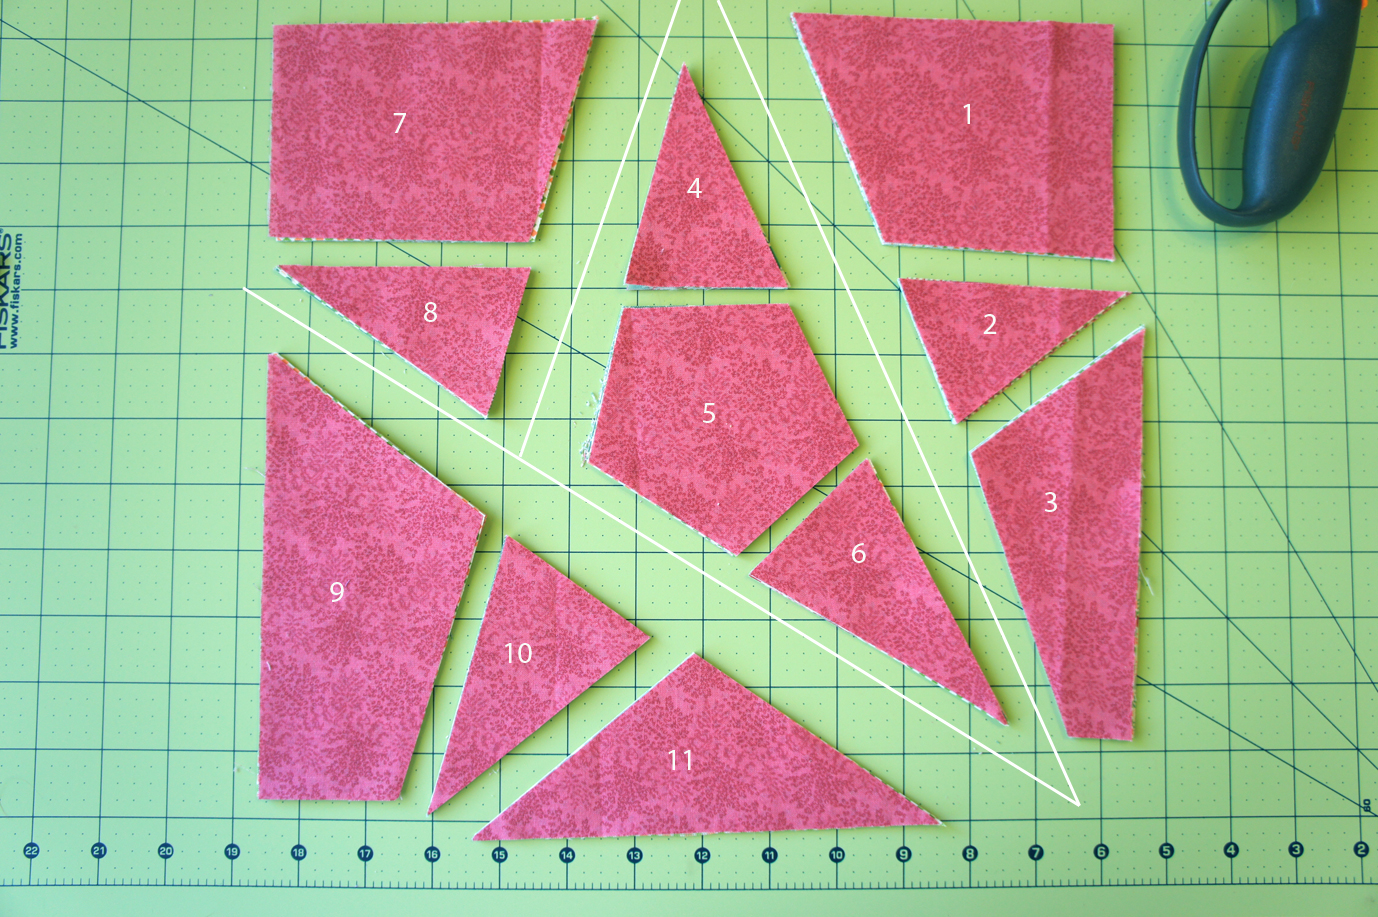
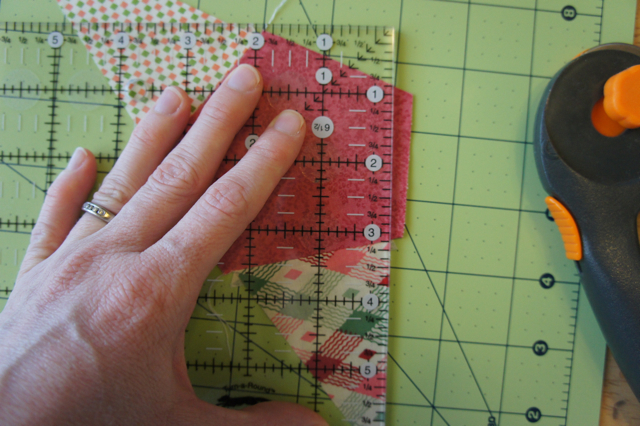
Note: Be sure that when you are sewing a “point” to a background fabric that you overlap it by about a 1/4″ on the “inside” so that the edges you’ll be sewing together later will require less trimming.
Except: when sewing the points (pieces 4 and 6) to the center piece (piece 5), line up the edges exactly so the point will be centered on the middle piece. There is no way to avoid trimming the center.
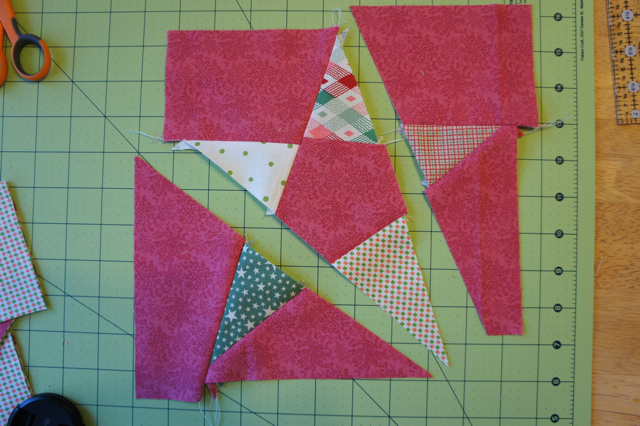
Sew pieces 1, 2 and 3 to each other, then pieces 4, 5, and 6 together, then 7 and 8 and finally 9, 10 and 11.
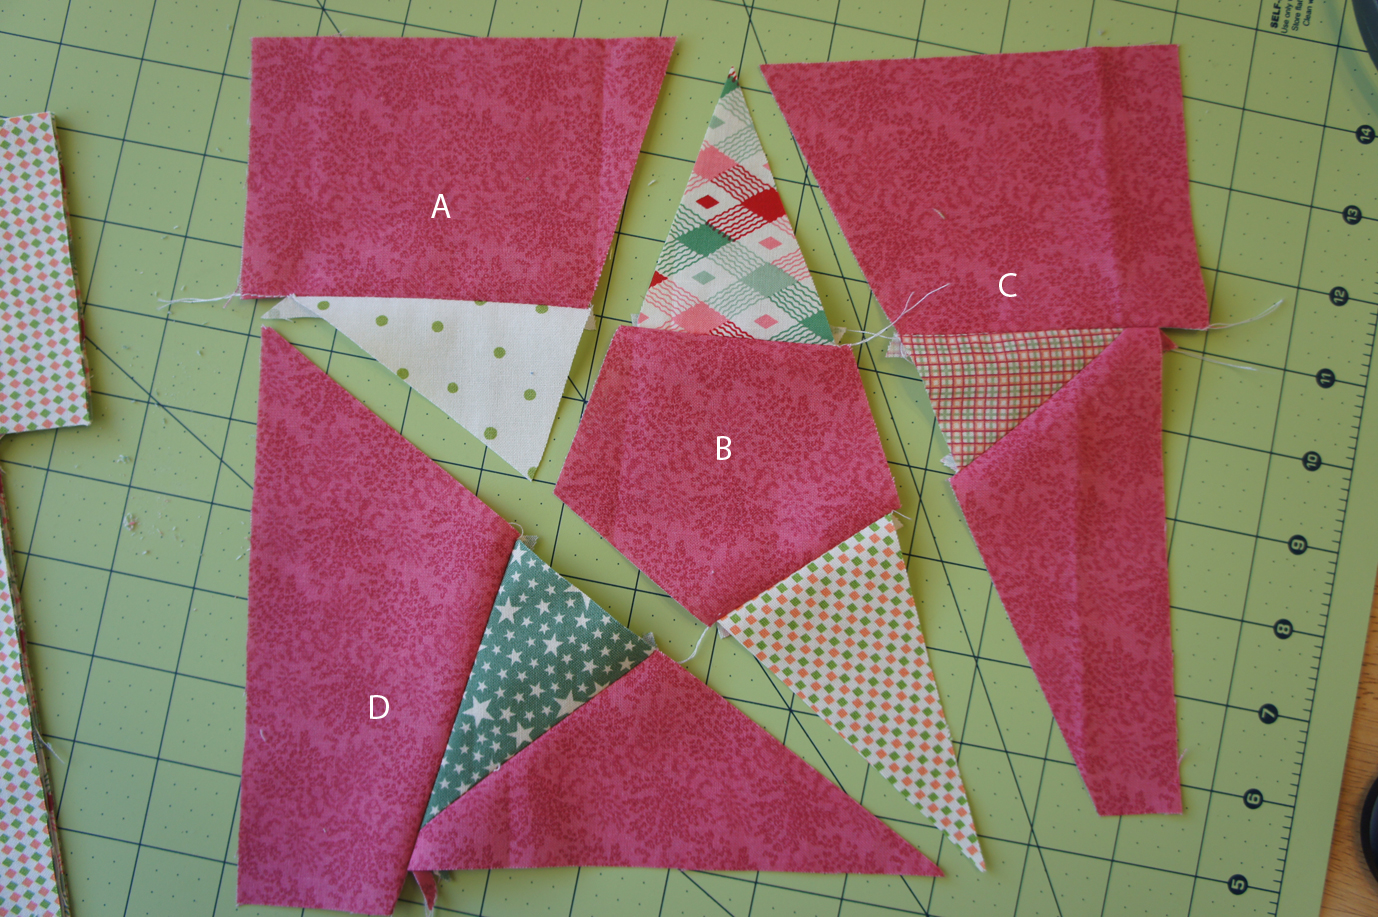
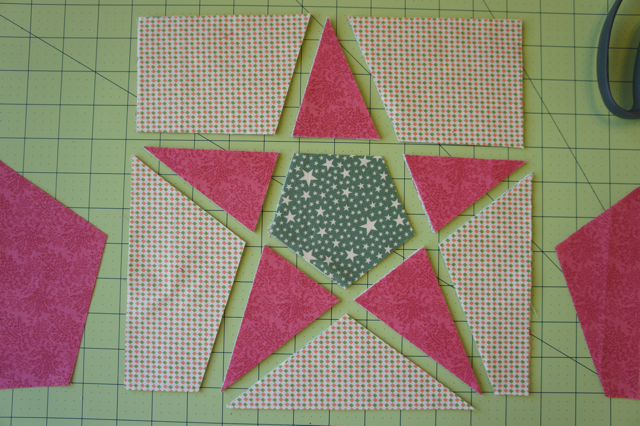
Next take piece B and trim the edge that abuts piece A. You’ll be removing part of the center pentagon. (Note that my piece is “upside-down” in this picture so I could more easily trim it from the right since I am right handed.)
If piece A does not have a straight edge give it a little trim too.
Now sew these two pieces together. (We will call this piece AB from here out.)
Now trim piece AB on the edge that abuts piece C, and piece C along the same side, if necessary.
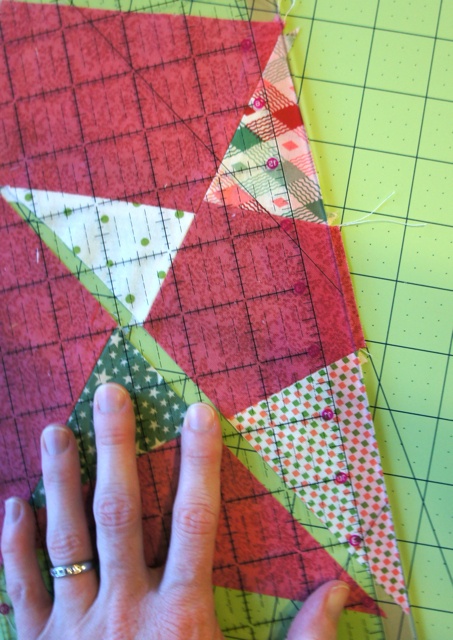
And sew AB to C, making what we’ll call piece ABC.

Trim ABC (mine’s upside down again for handedness purposes) along the (last!) side abutting piece D. By this time you will most certainly have dog ears to trim if nothing else.
Again, trim piece D if it needs it. Mine actually came out pretty straight, so I didn’t trim it. Sew ABC to piece D and….

You are almost done!
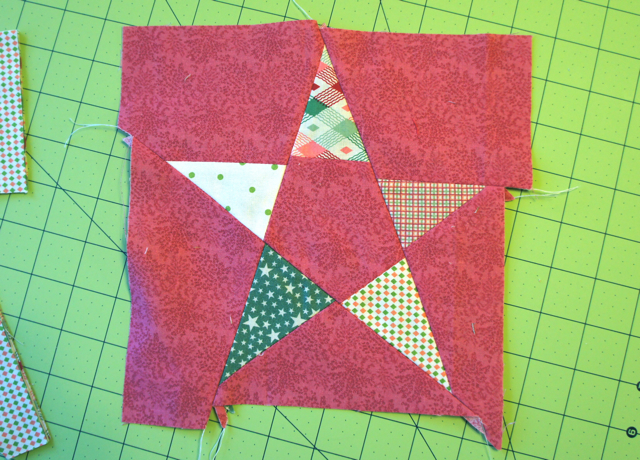
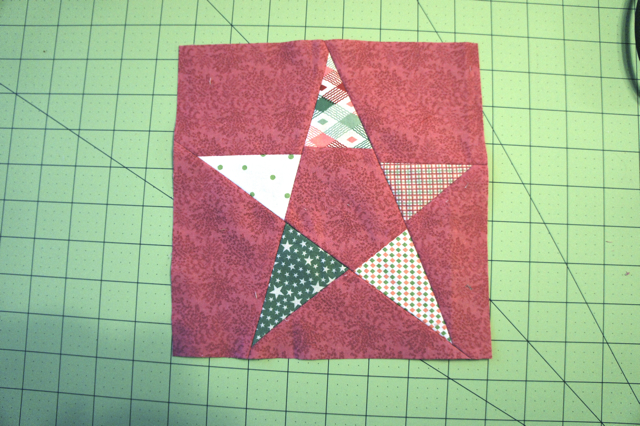
Trim the block square, being sure to leave at least 1/4″ from the tip of each point. My finished blocks ended up at 8″ with just over 1/4″ from the tip of each point.
As I said in the stack n whack tutorial, there are pros and cons to each technique. Here’s a little recap so you can choose the method you think will work best for you.
Pros
After cutting, one block can be made at a time
More control over the layout of each fabric in every block
Slightly larger blocks
Cons
Lots of little pieces to keep track of
10 seams (vs 5) for each block
Each point is closer to the edge of the block
Another thing to note is that these stars automatically come out a bit wonkier because of the way the points intersect the center piece. That may or may not be a con in your book.
Remember that I would love to see your projects if you use this or the other tutorial.
Happy Sewing!
Comments
6 Responses to “Tutorial — 5 Point Star Quilt Block (Technique 2)”
Leave a Reply
You must be logged in to post a comment.
This tutorial is brilliant! Thanks so much for writing it up. I can’t wait to try it – stars are a favourite.
Thank you so much for posting this info for us!!! Just what I’ve been looking for! I even saved it to my favorites!! I plan to make one, rather large, star in the middle of my star quilt and this is just perfect!!!
Love this pattern. How can I vary the background fabrics with the light and dark stars.
Instead of having a solid color dk around a light star, and visa versa?
Would love to have that information if you have the info for this technique.
Thanks again for the time you have put into the tutatorial.
Thank you for this!
What’s up all, here every person is sharing these knowledge, soo it’s good too read this web site, and I used to
pay a quick visit this weblo everyday.
Hi!
I have been looking all over for a 5 point pattern and almost gave up when I found your tutorial. I like this one better than no.1.
Thank you so much.
A new quilter, Linda