Aug
29
I finally finished some of my unfinished business! Sean’s baby busy book is all done and all ready to be be used quietly. Yeah right!
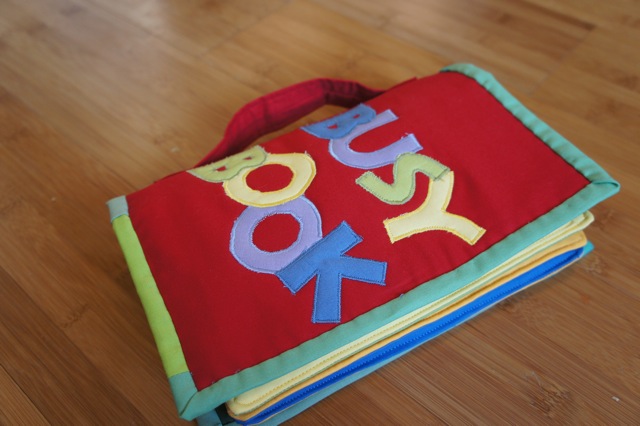
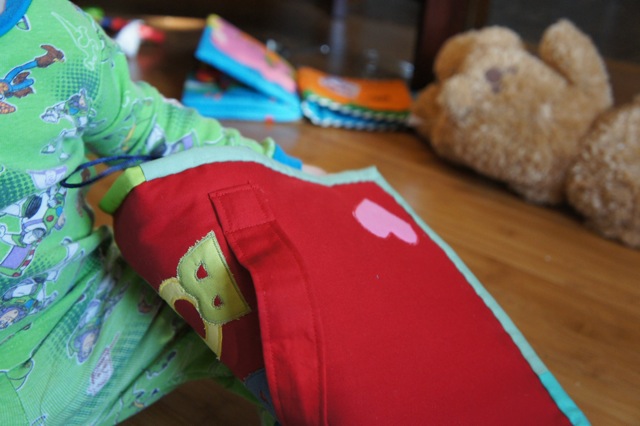
Considering I did the entire book off the cuff and with nothing but scraps, I’m super happy with how it came out! (And oh! my! god! could I use any more exclamation! points?) The front cover is just machine appliqued letters that I blew up in Adobe Illustrator to something like a 500 point font. They’re not quite satin stitched down. I don’t have the patience for that, but I did use a very narrow and short zig zag. Pretty awesome for a first time if I do say so myself.
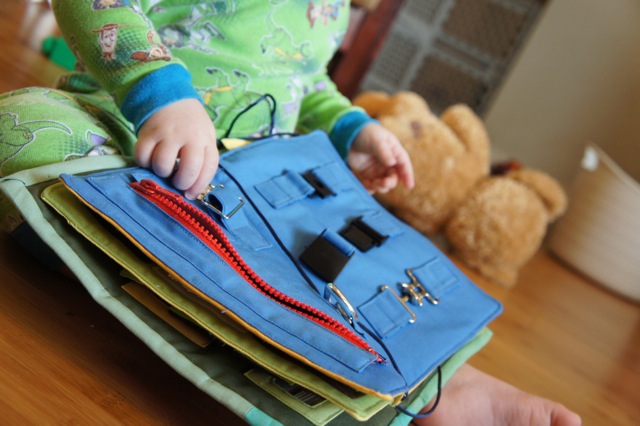
So that’s the cover — and you can see a little of the handle there too — but I agonized over what to put in the pages. I knew I would do a buckles and latches page. The boy is really into hooking and unhooking things. Well, more into the hooking and then screeching eh-eh-eh until one of us undoes the clasp and he can start again. I suspect rides in the grocery cart will be less than fun soon.
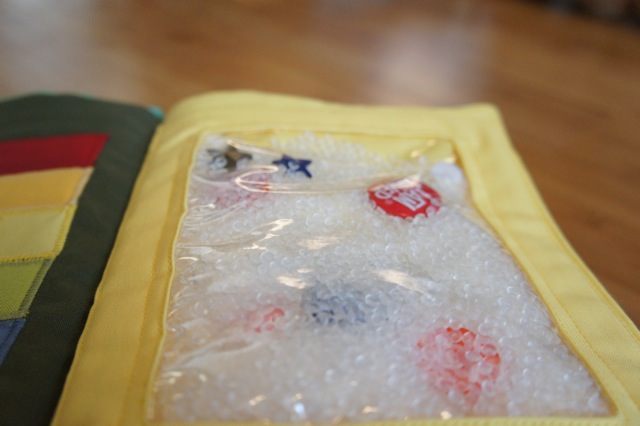
But I digress — again. I saw some neat ideas for an I-spy window and I already had the little clear pellet thingys — what are those called? — and the plastic sheeting, so Alexis and I scrounged up a pretty good pile of little odds and ends to include in the window. I finally settled on just a few buttons and “jewels” and I’m glad I did. I think this is one of those cases where less is more.
And I really wanted to put something on every single page including the front and back covers, so you can see the satin stitched rainbow rectangles on the front cover in the previous picture. Yes. I am that into rainbows.
Here’s a page for matching shapes and colors. I sort of wish I had done the shapes page in colors other than the movable parts to emphasize the shape matching, but oh well. I mean, the kid isn’t even 14 months old! He’s lucky if he can get the velcro to stick. Speaking of velcro, if I did this again, I would put velcro centers on both sides of the movable pieces, just to make it that much easier.
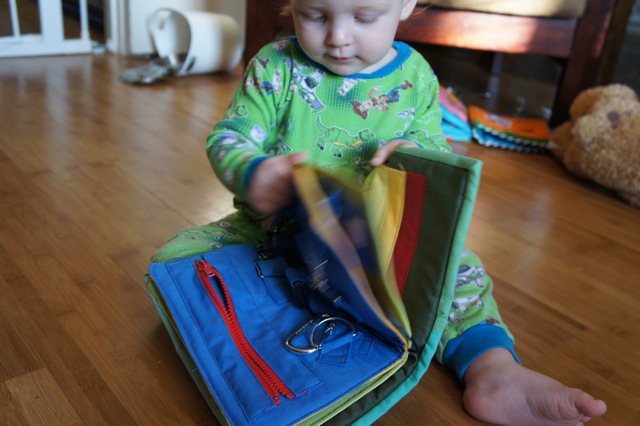
The latch page. The one I gave you a sneak preview of. This is the only part of the whole book where I bought something. I have tons of zippers, and a few catches, but they are all very hard to maneuver. Even more so for tiny fingers I’d think. I spent a small fortune picking out different clasps. Unfortunately, they’re all packaged in such a way that you can’t see how easy — or difficult — it is to use them until you get them home. So if you’re planning on making a whole bunch of backpacks or shopping cart covers or anything else you might need to buckle shut, let me know.
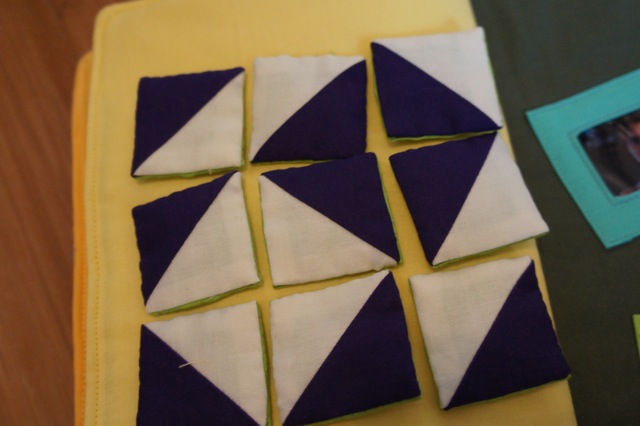
Alright. This page was my brain child. I spent hours rocking the baby and dreaming up just how I was going to make this work. Each of those HSTs, spins so that different patterns can be made. So far, Sean is just interested in trying to pull them off, so I guess all that time thinking of how to make them spin without tiny parts (read: buttons) coming off really paid off.
Wanna know how I did it? Actually, maybe I should patent the idea first… ok, no. You read it here first. My genius idea!
Each of the tiny quilted squares has a backing with a grommet in in. I sewed a button to the back page with the grommeted square underneath. Then I hand stitched (after ironing and cursing for burning my fingers a thousand and one times) each of the HST blocks to each grommeted back. I’m pretty sure that made no sense, but the idea was to have the square spin around a button hole, but if I used a button hole, the pieces would come off easily. with the grommet, even if the piece does eventually inevitably come off, the button will be trapped inside the square. Voila! No choking.
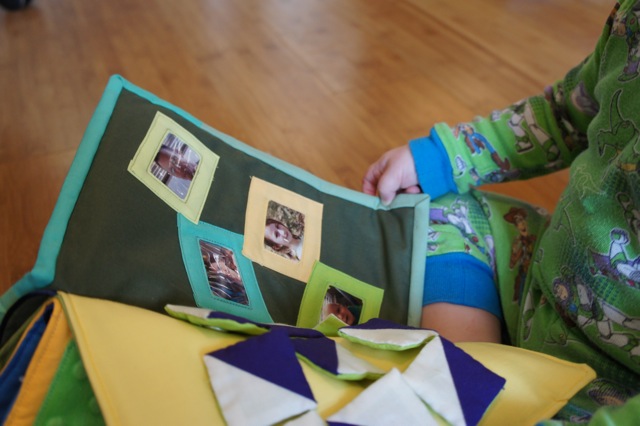
And the back cover. I’m not sure what inspired that page, but I thought it would be neat for our pictures to all be in there for Sean to look at. I think it’s his favorite page after the clasps and the page where he gets (to try) to rip the HSTs off.
I sort of forgot to take a picture of the pages of textures. Ok, I didn’t forget, I just couldn’t get a picture that portrayed the different fabrics I used. That and cuz it’s kind of an ugly page. You can see a tiny bit of the green minky that is one of the blocks up there in the bottom left corner.
The back of the back cover. I told you I wanted something on every page. So there’s mommy’s love. I thought about stitching “Love, Mom” or something equally cheesy on there, but decided against it. Mostly because I just wanted to be done with the damn thing.
The scrappy binding shows up pretty well in this picture, too. I was very disappointed to find that I did not, in fact, have any Kona coal left over from the firebird quilt. I had envisioned using that for the binding, but well, we like scrappy too. I doubt Sean cares at all. He was just screaming for me to give him the damn book while I was trying to furiously sew the binding on. He grabbed it so fast when I was done, that I about didn’t get all the pins out of it.
I think he likes it.





Coolest Mom Ever. You are so talented!
This is awesome. You’re so creative!
Hey,
just found your blog. That book is awesome!!! I really really love that idea!
Take care,
Segelfliege
Jealous! That’s awesome. Sasha is in love with buckles. I get “Hep, hep, HEP!!!” when she needs, you know, help.
I’m glad you mentioned the buckles. Trying to make one of these for my 2 yr old nephew, (for his first non-infant plane flight) and haven’t been able to find ones I think would work well for his little fingers.