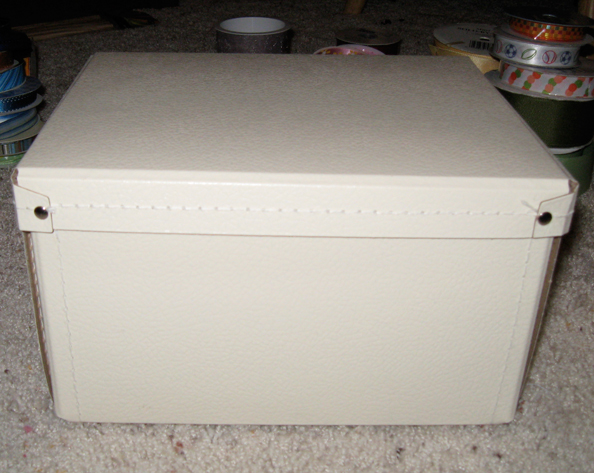
Nov
5
Ribbon Storage Box Tutorial
Filed Under Crafting, Sewing, Storing | 34 Comments
) Ever since I made the first ribbon storage box to mimic this box from Oriental Trading, I’ve been thinking about how hard I looked for a good tutorial on the subject. I can’t promise that my tutorial will be “good”, but I’ll show you what I did.
Ever since I made the first ribbon storage box to mimic this box from Oriental Trading, I’ve been thinking about how hard I looked for a good tutorial on the subject. I can’t promise that my tutorial will be “good”, but I’ll show you what I did.
The first big problem is to find a good sturdy box that will accomodate a good number of ribbon spools I ended
up buying two of these (plus a smaller version of the same box) from IKEA. The great thing about them is that they are sold in packages of two, and they require assembly. Yep, you heard me right, I *LIKE* – in this case – that they weren’t complete on shipment. Here’s why:
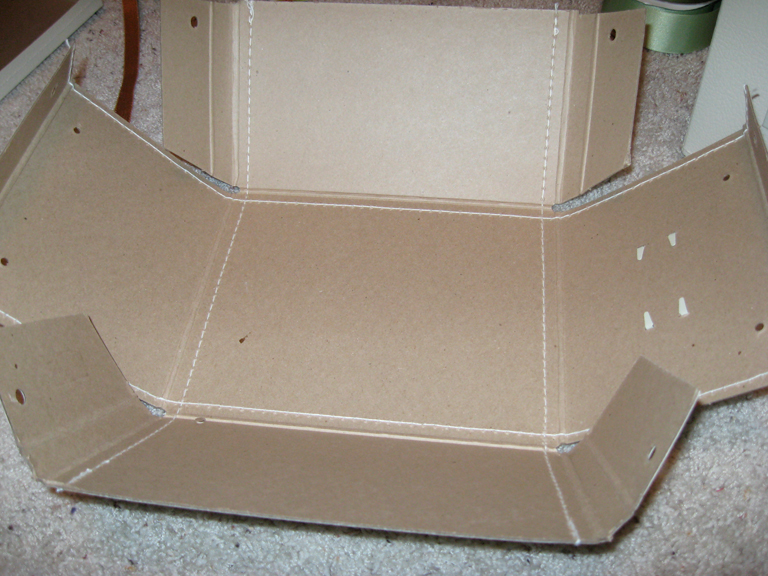 Because they are shipped flat, it’s much easier to mark the holes and insert the eyelets. But don’t let that discourage you. Any sturdy cardboard box would work.
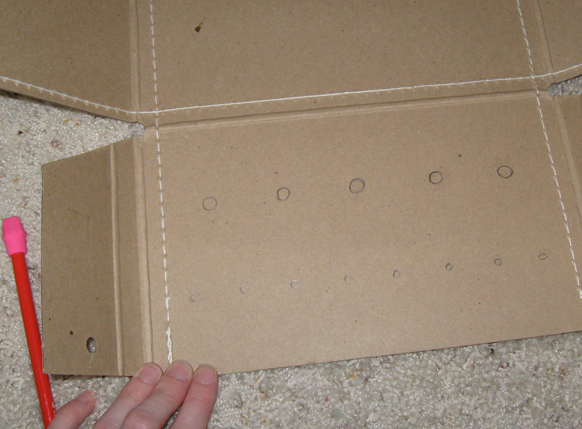
The first step is, then to mark where you want the holes. I found that because I could put two rows of ribbon in the box, that I wanted lots of holes to poke it through. So I created this layout. 5 large eyelets on the bottom row, and 8 smaller ones on the top. I just drew two horizontal lines where I wanted each row to be and then evenly spaced each hole. (On this go round, I just opened the box I had completed already and traced the holes locations.)
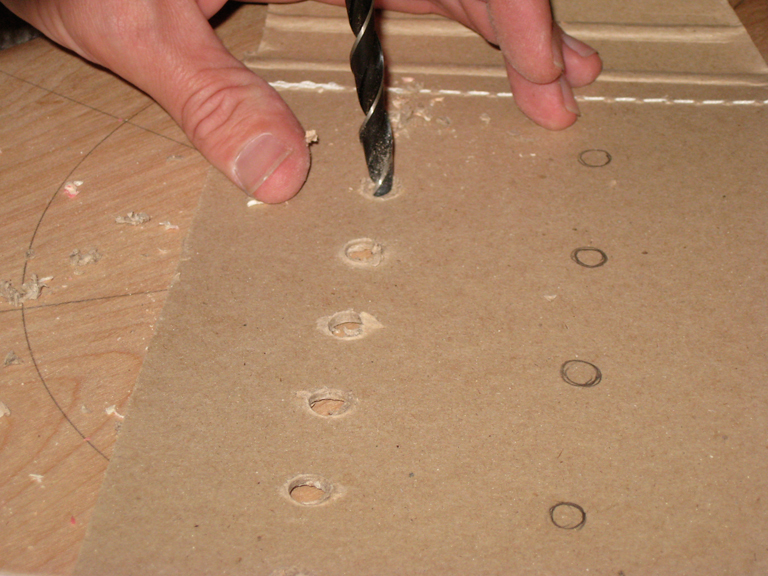 During my first attempt, I cut each hole by hand with an Exacto knife. That proved to be really hard as this is some seriously thick cardboard. So this time around, I asked my hubster to try using the drill. Ahhh… I saved the aching in my hands and ended up with much cleaner holes! Each hole he drilled was just a tiny bit bigger than the opening in the eyelet.
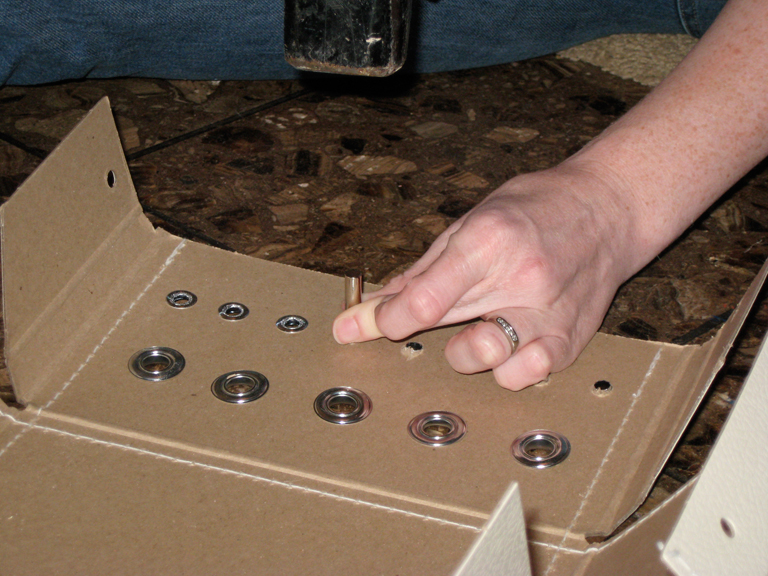 Next, just insert the eyelets. The large and small follow a similar process, but follow the instructions on your eyelet kits.
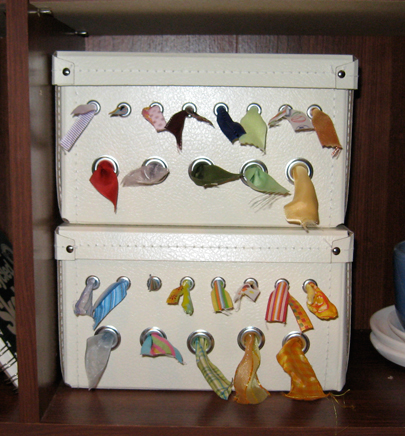 And voila! Your own neat ribbon storage! You can see that even with the extra holes I still needed to thread 2 ribbons through some. So far, that seems to be working ok. And it’s really easy to see what I have, and actually USE it because it’s easy to get to.
Now, does anyone know what to do with the little “bobbins of ribbon”? I have a million of those too!!!
Nov
1
Just say “No”
Filed Under Parenting | 4 Comments
 A friend of mine recently turned me on to a photographic series done by artist Jill Greenberg. Each photo (which is manipulated by the artist after processing) is a child crying. Some are merely weeping while others are in full out temper-tantrum mode.
There is (or was – I’m rather late to the picture) a huge controversy over whether these photos constituted child abuse. The artist has stated that to upset the children, a lollipop was given and then taken away briefly. Most of these arguments contained something about how the children will suffer long term damage from being “exploited” as such.
Now tell me, is there really a case of a sociopath whose only abuse was getting something taken from him? Honestly, why are we putting our children in bubbles? I don’t understand the parental mentality that says we can’t tell our children “no”. But then, maybe I’m abusive, too. I’ve threatened to take pictures of Alexis when she is throwing a fit, and actually done it, too. Guess what? She quit screaming after about the third shutter click.
Either way, you have to admit that the pictures show nothing but raw emotion. Whether or not that is art is in the eye of the beholder.


