Nov
5
) Ever since I made the first ribbon storage box to mimic this box from Oriental Trading, I’ve been thinking about how hard I looked for a good tutorial on the subject. I can’t promise that my tutorial will be “good”, but I’ll show you what I did.
Ever since I made the first ribbon storage box to mimic this box from Oriental Trading, I’ve been thinking about how hard I looked for a good tutorial on the subject. I can’t promise that my tutorial will be “good”, but I’ll show you what I did.
The first big problem is to find a good sturdy box that will accomodate a good number of ribbon spools I ended
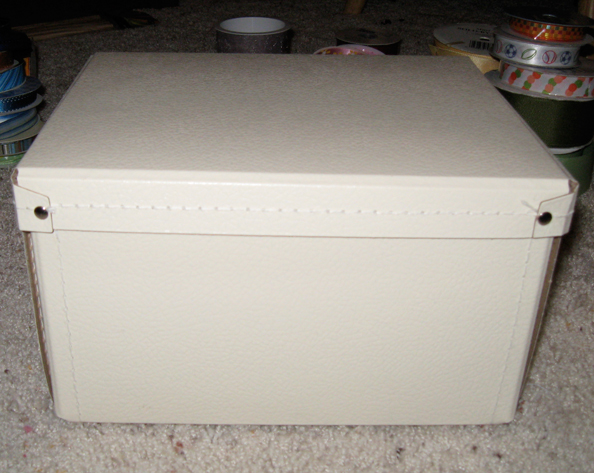
up buying two of these (plus a smaller version of the same box) from IKEA. The great thing about them is that they are sold in packages of two, and they require assembly. Yep, you heard me right, I *LIKE* – in this case – that they weren’t complete on shipment. Here’s why:
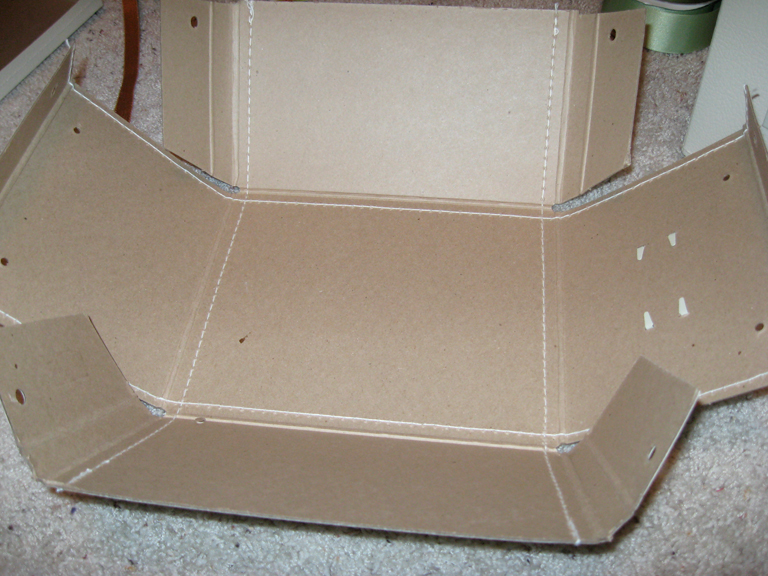 Because they are shipped flat, it’s much easier to mark the holes and insert the eyelets. But don’t let that discourage you. Any sturdy cardboard box would work.
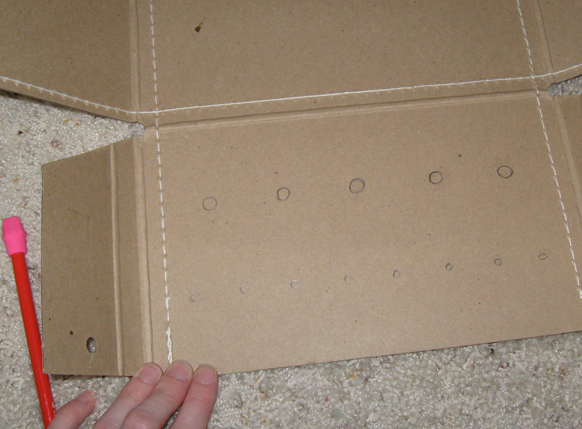
The first step is, then to mark where you want the holes. I found that because I could put two rows of ribbon in the box, that I wanted lots of holes to poke it through. So I created this layout. 5 large eyelets on the bottom row, and 8 smaller ones on the top. I just drew two horizontal lines where I wanted each row to be and then evenly spaced each hole. (On this go round, I just opened the box I had completed already and traced the holes locations.)
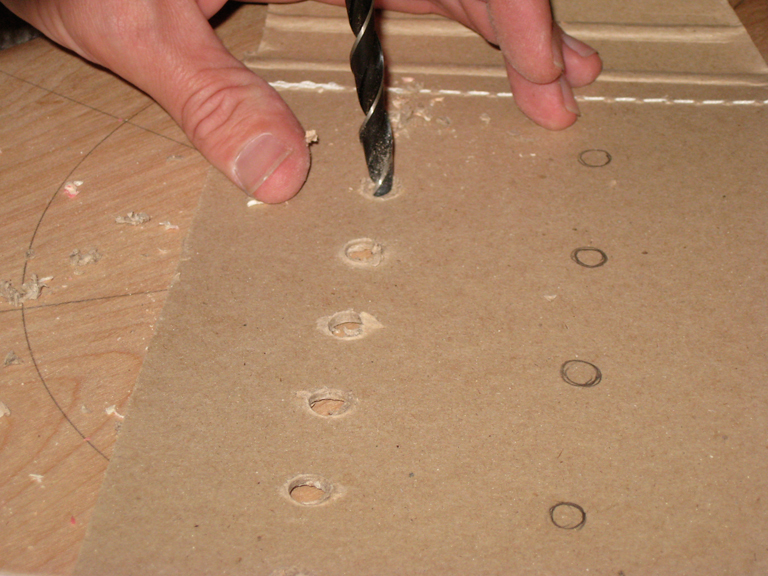 During my first attempt, I cut each hole by hand with an Exacto knife. That proved to be really hard as this is some seriously thick cardboard. So this time around, I asked my hubster to try using the drill. Ahhh… I saved the aching in my hands and ended up with much cleaner holes! Each hole he drilled was just a tiny bit bigger than the opening in the eyelet.
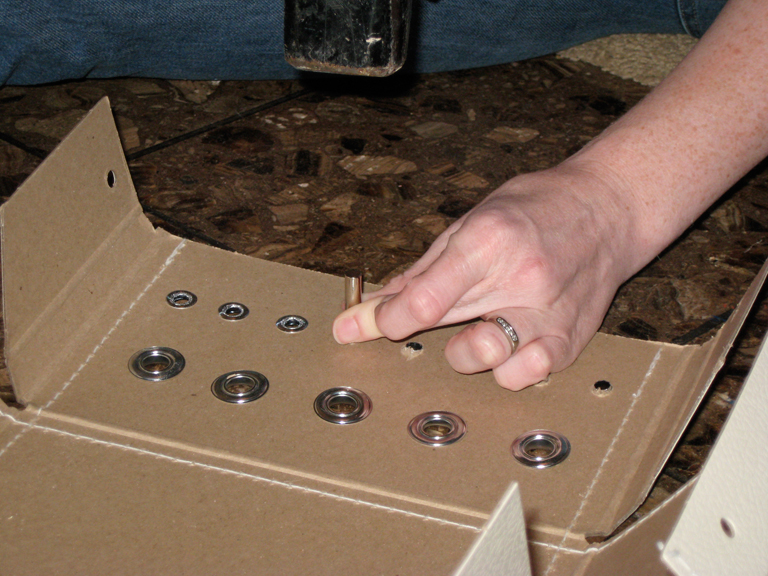 Next, just insert the eyelets. The large and small follow a similar process, but follow the instructions on your eyelet kits.
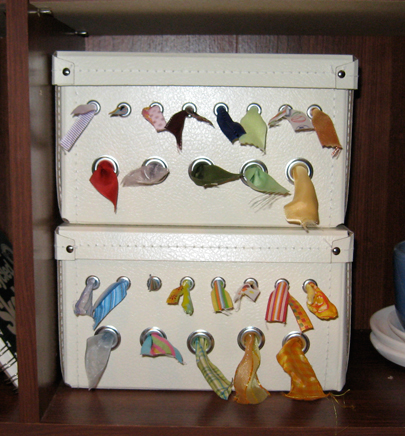 And voila! Your own neat ribbon storage! You can see that even with the extra holes I still needed to thread 2 ribbons through some. So far, that seems to be working ok. And it’s really easy to see what I have, and actually USE it because it’s easy to get to.
Now, does anyone know what to do with the little “bobbins of ribbon”? I have a million of those too!!!
Comments
34 Responses to “Ribbon Storage Box Tutorial”
Leave a Reply
You must be logged in to post a comment.


Oh, very cool!
I need to make one right away.
Thanks for the tutorial.
Love your idea! Unfortunately, I posted
“Awesome Idea!” under you post about the photographer taking pictured of crying children. Erm. Sorry. *This* is an awesome idea! The other… not so much.
Wow this is such a great idea, I am so in need of ribbon organization.
That’s a great idea!
It`s so clean an clear! Great!
So great, I love it! I think my 4 year old would love one of her own too :)
great idea and excellent tutorial, now i have an excuse to get an eyelet set!
i use expired ribbon spools (and plastic jar lids, etc) to make silly hats like these:
http://blogfullofjelly.blogspot.com/2007/11/hats.html
and this one:
http://blogfullofjelly.blogspot.com/2007/11/i-have-been-wearing-this-around-house.html
they are made with tiny scraps of ribbon and fabric and lots of fabric glue and are the most fun rainy-day activity.
How does the ribbon sit inside the box? Sorry if I missed something obvious, but is it still on the spools, or just lying loose inside?
Very cool. I sure can use them, thanks.
The ribbon is on spools sitting on edge in the box…
it isn’t just handy but it looks neat also. great idea.
wow this is great!!
I love this idea and it will work wonders for my silk ribbons. They are always in a tangle and have to be pressed before use. Thank you for sharing.
Wonderful tutorial. Nice job on the boxes, too. I have a few extra bobbins and just do what my Mom did – keep them all rolled up inside a tiny zip-lock bag inside the sewing machine. I’ll look forward to hearing what your readers suggest. :-)
(MIFS)
Great organizer! I’d love to share this idea with my readers. Would you give me permission to link to your project and share one image?
Cyndi L
cyndi@b5media.com
Ribbon Box is very very cool.
Thanks,
Deb
Could you takr a pic of the inside and how it looks with all the ribbonin there? It is really cute.
[...] Ribbon Storage Box Tutorial: Here’s a tutorial for making a ribbon storage box using Ikea’s storage boxes. [...]
[...] a dozen zip-lock bags, etc. Here’s a really clever idea for keeping them all straight…JM Day shows us [...]
[...] found 2 that are made with card board boxes but they don’t have dowels through them! Ribbon Storage Box Tutorial : I’m not a geek, but I play one in real life Ribbon Storage Box – Craftbits.com Craft Project but I looked at the plastic one offered at [...]
I would like to see a picture of the lid open to see how the ribbons are laid out in there. This is a great idea and boy do I ever need ribbon storage.
Sally
Hey! I’ve been looking for a ribbon box for the larger quantity spools of ribbon that I have. I like your idea and it certainly looks easy enough. I’m going to give it a try! thanks for putting this out on the web. Happy Holidays! :-)
This is sheer brilliance! Love the way you disassembled it & did it. Genius! Thanks for sharing all the steps. :O)
Great tut!
You should put it up on ikea hacker
http://ikeahacker.blogspot.com
(don’t worry I’m not associated with IH, I just love the site LOL)
This is brilliant! I saw you featured over on Ucreate, craft-ON-sista!!!
wowwwwwwwwwwwwwwwwwwww…….very good!Hugs from Brazil!
Di
LOVE THIS!!! Thanks!
[...] at this tutorial! it’s so clever and by the end of the project you will have the coolest storage for your [...]
This looks so cute and sturdy compared to others I’ve seen. Here’s a link to making a ribbon organizer for those small leftover bits using an egg carton.
http://www.craftbits.com/viewProject.do?projectID=2515
You are AMAZING!!!! I have tried every kind of home made ribbon storage trick I could come up with and they all failed miserably after wasting time, money, and effort. :(
I just purchased a Crop a Dile Big Bite which I have been dying to use. Now I can play with my new toy and solve a storage problem as well!
Thank you! Thank you! THANK YOU!
Jeannie
Those ‘ribbon bobbins’ make great bases for elaborate tassels with fun figures glued on for toppers.
i.e. Glue layers of fringe and loops of ribbon around sides, even bottom if desired, then glue on a finial top or a little figure of some type.
You’ve got an elaborate, one-of-a-kind tassle!
Thank you for this easy-to-do DIY, as I have extra ‘photo/craft’ boxes left over which will be ideal for ribbon storage boxes.
They are just sitting there all black and plain waiting for this exciting transformation with modge podged scrapbooking paper covers and a little ribbon trim!;)
I think your idea is fantastic but how do you keep the ribbons from trangling up.I have a lot of loose ribbons. Mandy
Mandy, All of my ribbons are on spools. I keep the loose ones (usually shorter pieces) in a separate box. Those are still willy nilly. I suppose if you have longer lengths, you could wrap them around a dowel?
I love it.
Cool.