


Sep
4
Robot Quilt
Filed Under Quilting, Sewing | 6 Comments
I’ve been teasing instagram viewers with shots of this quilt in progress for weeks — maybe months — but it’s finally done. A quilt for my favorite little guy.
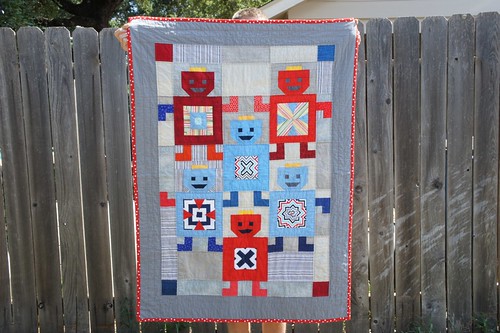
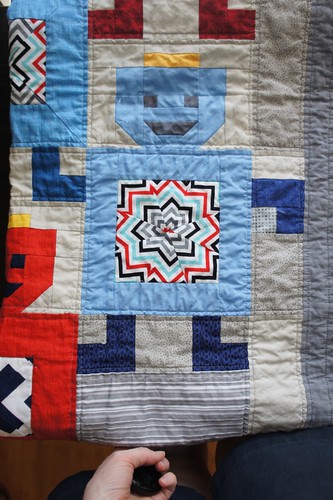
I’m not sure what inspired the robot theme. It was so long ago that I dreamt this pattern up. I thought about it for weeks before I got up the nerve to draw it out in Illustrator, then I waited even more weeks before I actually started piecing it. The whole top is paper pieced. I was worried about that at first. I was thinking there would be too many seams, too many tiny pieces, but it seems to have worked out just fine.
I started with quite the collection of reds, blues and grays. Then threw in that Remix zig zag print and another stripe at the last second. Originally I’d considered doing the whole quilt in solids. I sort of wish I’d gone with that. The whole top is very very busy… Just like it’s new owner (“I buzzy momma!”).
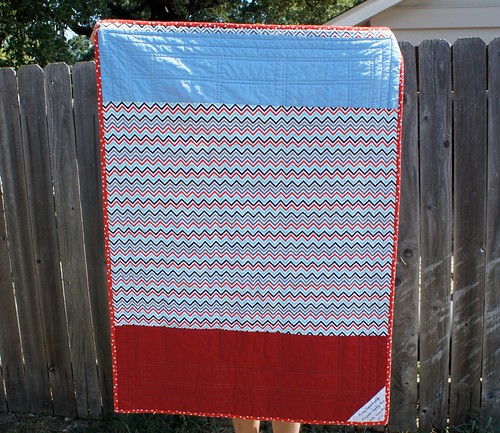
The back and binding were a bit of a challenge. After I’d put the border on the top, I was about 2 inches short on the backing. And the amount of fabric I had left from the top was seriously about 6 2 inch strips in various fabrics and lengths and that big piece of Remix. Finally I scrounged up enough of the remix to squeak out the needed length. Poor Chris and Alex offered about a million suggestions, none of which I took. I also solicited help in choosing the binding on instagram, twitter, and facebook. But guess what? I didn’t take any of those suggestions either and ordered this red polka dot and another multicolor dot from the Remix collection. Obviously I picked the red, but I’m not sure I really like it. I think it’s really very Christmassy. On the other hand, the other dot was just a bit too much for the eye.
I’m really loving doing these quilt labels with the embroidery. It’s such a change of pace after piecing a quilt to sit on the couch with some trash tv show on (ahem anything on HGTV), and stitch away. I wonder if Sean will sleep with the label by his face the way Alex does with her quilt.
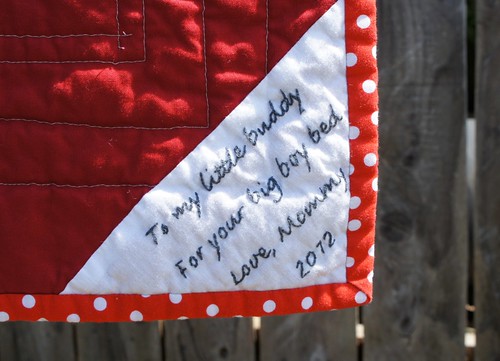
PS — wow, my quilting stitches look awful in that picture! I swear they are way straighter and more even than that in person… Really. wink wink.
Aug
15
Mermaids Again!
Filed Under Sewing, Wearing | 3 Comments
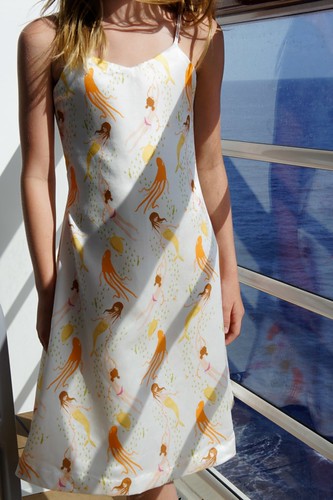
It’s a sickness, I know. When Heather Ross posted her mermaids for sale on Spoonflower* I had to have some even more so I ordered a yard. But in all my excitement I didn’t notice that the default fabric was the cotton silk blend, so when this gorgeous silky fabric arrived in my mailbox, I couldn’t help but feel a bit let down. What was I going to do with this type of material that was so suited to a formal dress?… especially since I only had a single yard. And then, I realized that Alexis needed a new formal dress for our cruise vacation that was coming up.
There was still the issue of limited fabric, and so I began searching, or rather scouring, the web for a cute pattern. Of course, there were none to be found. So what’s a seamstress to do? Make your own pattern of course! Using one of her favorite tank tops, and my Sew What? Skirts book, I drafted my very first dress pattern. I was a bit nervous about it, too, so when I finally had the pattern down, I did a trial run using a cheapo quilting cotton that I got for $1/yard. (I have to admit that I found the fabric Alexis picked out for this “muslin” to be hideous, but once it was done I really liked it. She does have an eye for fashion, that one.)

After I’d drafted the pattern and made the trial dress, I was still afraid to cut into the fabric. I agonized for days about how to lay the front and back on the fabric so as to maximize it’s usage. The layout where the pieces fit best also had the unfortunate side effect of making the direction of the print “upside down” on the back. There were other possibilities, but they involved piecing the back together and it would have required making the skirt less full. In the end, I decided to go with the upside down layout and figured that probably no one but me would even notice. Actually, I don’t even notice.
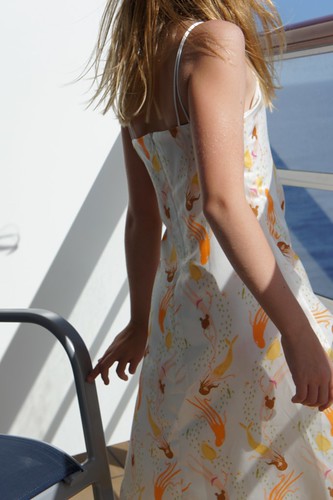
This was my first invisible zipper with a lining and I am amazed at how well it came out, but I think I need a different zipper foot. Mine is rather clunky, I’d like one of those ones that is super skinny. Actually, maybe I don’t, I get close enough to sewing through my fingers with the clunky one. Why tempt fate? ANYWAY…

After a lot of debate with myself and Alexis (have you noticed I have a decision making problem?), I decided to go with a double strap over each shoulder. I’m so glad I did. I think it just adds the perfect amount of detail to the back of an otherwise very simple dress.
So there you have it. My very first go at actual pattern making for clothing. Don’t get me wrong, I’ve made dresses without a pattern before, but there was no shape to them (think jumper style over the shoulder A-line toddler dresses) and I didn’t really make the pattern. I have to say, this was such a success and so. much. fun. that I’ll definitely give it another go someday!
P.S. The cruise was fabulous!
* I should probably mention that these Swimming Sisters are also not of the same size as the Mendocino prints, OR of the previous Spoonflower offerings. There’s a picture of the different scales of this print on flickr. The scale of this fabric is in the middle.
Jun
27
Charming Travelers Giveaway
Filed Under Giving, Quilting, Sewing | 6 Comments
A few weeks ago I won the second traveling charm pack started by Karen. Diane at from blank pages started the original swap, and Karen decided we needed a second charm pack circling around. I won the pack all the way from Quebec at Marika’s blog. As she says in her winner post, I’m very lucky at her site because this is the second giveaway I’ve won there.

Well now it’s your turn for a shot at this little bundle of fabric. The rules are that you receive this package of 5 inch charms and you can choose however many suit your fancy, but they must be replaced with high quality quilt store cotton charms from your own stash. You must also be an active blogger in order to create a giveaway of your own and to keep the chain going, you must be willing to ship to both the US and Canada. Also be sure to update the Charming Travelers page with your location if you win!
So, now that all of the fine print is out of the way, if you want to win this cute little bundle (and I’m just saying that I might be adding some HTF designer charms. wink wink) just leave a comment on this post.
Entries will be open until 10pm (Central) on Tuesday, July 3. I will draw a winner via random.org on Wednesday, July 4! Good Luck!
Jun
21
Round Travel Bag Tutorial
Filed Under Remembering, Sewing | 5 Comments
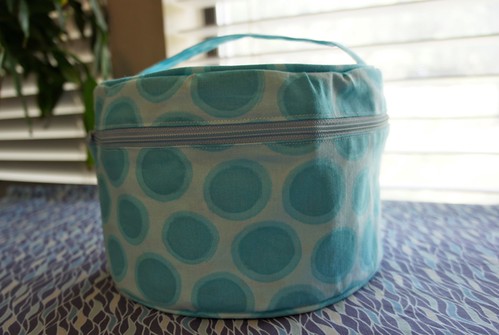
Remember I told you that I had another project keeping me from the quilt for the boy? I’m so excited to tell you that today Sew,Mama,Sew! has posted a tutorial I wrote for this Round Travel Bag.
It’s based on a bag I had when I was in college (and we won’t talk about how long ago that was!) and is really the most functional little toiletry bag I ever owned. I hope you enjoy it!
Jun
13
Quite some time ago I mentioned that my sewing space had been usurped by a certain small human that lives with us. I moved everything up into our loft, which was formerly the TV room. Now it’s the TV and sewing room.
Unfortunately, pretty much none of my storage solutions or furniture transferred up into this much smaller space very well, so we had to hunt for new furniture and I had to try about about 30 different storage solutions before settling on one that seems to be working for me.
We bought this little desk at Furniture in the Raw after 2 failed attempts to find something on craigslist. Of course, that meant that Chris had to finish it, but to his credit he got it done very quickly. The 2 “drawers” on the right are really a keyboard tray which is still where I store my thread tray and bobbins. I really like having them right there within reach, but completely out of sight so that I don’t have to look at the little hanging threads everywhere. The drawer on the left is holding all kinds of odds and ends… including stuff of Alexis’ that I have asked her to pick up too many times to count that I finally pick up and hide in there. Hee hee.
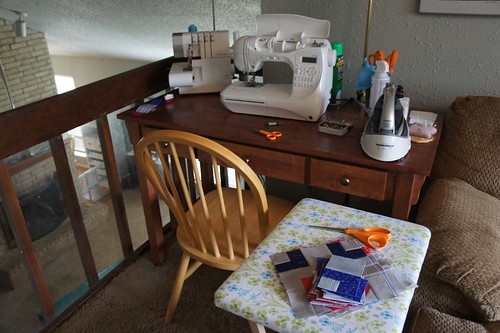
I’ve never had a pressing table within arms reach of my machine, but after a recent bout of tromping back and forth with the boot on to iron every other seam, I decided to move things around to make room for it. Sigh. This is another of those things that I can’t figure out why I didn’t try it earlier. Sure, the iron takes up (valuable) space on my (very small) desktop, but the convenience is just amazing.

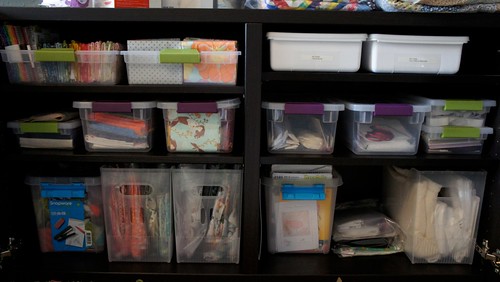
A couple of weeks ago we made the trek to IKEA to pick up this new “entertainment” center. Ok, it’s really a “sewing junk” center with a few drawers for DVDs. Originally, we’d planned to put built in cabinets all along that wall (which has just attic space behind it) and maybe that will still happen long term, but the mess and the mismatched oversized furniture that was there before was bugging me enough to spend the cash on these new storage units.
On the inside, you can see I have my fat quarters and fabric scraps all neatly stored in bins on the left side of the cabinet, and my notions and WIPs and batting scraps on the right. My main fabric stash is in the two file bins you see in the photo above (actually there’s a third, but it’s fabric I rarely use like polar fleece and some garment and home dec fabrics so it’s hidden away in a closet). I’ve hung each piece that is 1/2 yard or larger on a hanging file folder. It’s really easy to flip through them and find what I want.
I had to really pare down the stash and tools, etc to get everything moved up into this small space, but I don’t think I actually sacrificed anything I can’t live without. In fact, I’m not sure I have (yet) missed anything that I’ve gotten rid of.
So there you have it. Our finally less cluttered loft and my “new” sewing area. I really hope this is the last time I have to move it for a while. 3 iterations is just too many. Of course, I’m not saying that I wouldn’t be thrilled at the prospect of building a studio all my own, but for the time being, I actually like being able to sit up there and sew while the rest of the family watches TV… They probably feel otherwise. Especially when I floor the sewing machine pedal over 4 layers of denim.