







Dec
10
Git ‘er done
Filed Under Crafting, Sewing | 3 Comments
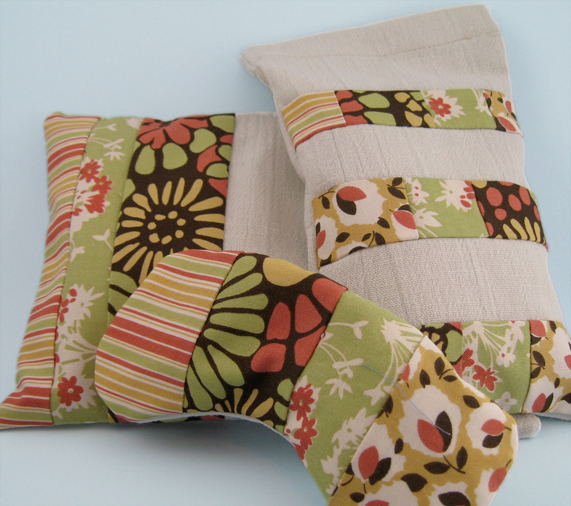 Things are picking up around here. I’ve got these fun spa pillows finished (filled with rice, buckwheat, and flax seed. They are for a secret Santa exchange that some Etsians are conducting. Of COURSE I notice after they’re all finished that my recipient is in SCOTLAND. It’s gonna cost a million and one dollars to ship these babies. But they’re cute, no?
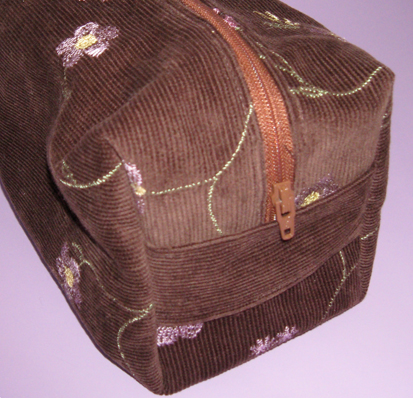 I also managed to create a little something just for me. (I never do that. Why don’t I ever do that?) It’s a new Pooh-bag. I know. Now you’re crinkling your eyebrows and wondering why I call it that. Years ago, a friend of mine had the cutest toiletry bag with classic Pooh all over it. I had to have one. It took me almost a year, but I finally found one and had to have it. I’ve always referred to it as my Pooh-bag. As in “Honey, will you get my medicine? It’s in my Pooh-bag”. Two years ago, I made Alexis a Pooh-bag. It’s purple polka-dots, no Pooh-bear in sight. So now, all toiletry bags are Pooh-bags. At least in my house.
Nov
29
For Sale: Tree Making Kit
Filed Under Crafting, Selling, Sewing | 2 Comments
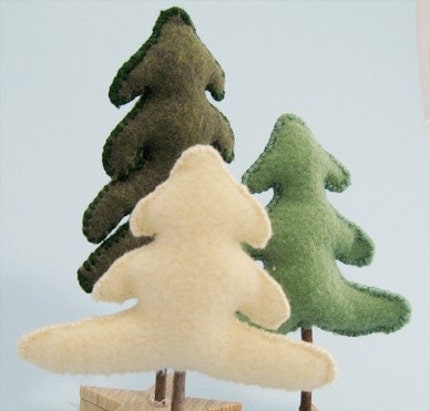 I can’t understand why these beauties have not just flown off the (virtual) shelves. I listed them in my Etsy store about 2 weeks ago, and while they have been in a few treasuries, and have a fair amount of views and hearts, they seem to just be lost in the crowd. Do people just not have time to make crafts during the holiday season anymore? I hope not! Crafting at Christmas is one of the few things that keeps me sane!
Nov
15
For Susan – who is living vicariously through other people’s knitting
Filed Under Crafting, Knitting, Sewing | 5 Comments
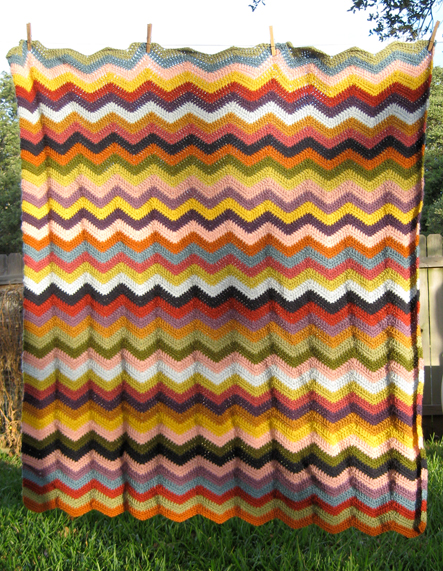
A picture!!! I finished the ripple blanket about a week ago. It’s so soft and snuggly. Both Chris and Alexis are trying to claim it as their own. Alexis is dragging it up and down the stairs and getting even more golden retriever fur on it. (I’m sure there is a good amount *IN* it)
I’m really pleased with how it turned out. Alex helped me pick the colors, and I really really like them. And in order to keep them sort of random, she also would pick the next color as I got near the end of a row. Though, to be fair, Chris helped with that after she went to bed.
I think I figured out that this sucker is made from FOUR (yes FOUR) pounds of yarn. It’s heavy. Anyway, at least that sucker is out of my system.
Last night I finally got the bottom ribbing and a few rows of stockingette stitch done on my sweater. Only like 14 inches to go until I get to the fun part. Sigh… at least I can do it anywhere and mostly without looking. I’d better get more movies from netflix.
But man, I’ve got an issue, cuz the sweater is the second project in a row that I’ve done with “cheap” yarn from Michael’s. I’m SO not a synthetic fiber kind of girl. I’m actually a fiber snob. I want hand dyed stuff for fabric, embroidery floss, and yarn. I need to drag myself to the new yarn store. Especially since the sewing room has SO much more room in it to hold yarn and stuff.
Really, I swear I’ll take pictures of the room someday. When it’s perfect. Bwa-ha-ha-ha.
And go over to yarnbar and checkout Susan’s super cool knitted robot. (And about a million other cool projects she and Gina come up with)
Nov
5
Ribbon Storage Box Tutorial
Filed Under Crafting, Sewing, Storing | 34 Comments
) Ever since I made the first ribbon storage box to mimic this box from Oriental Trading, I’ve been thinking about how hard I looked for a good tutorial on the subject. I can’t promise that my tutorial will be “good”, but I’ll show you what I did.
Ever since I made the first ribbon storage box to mimic this box from Oriental Trading, I’ve been thinking about how hard I looked for a good tutorial on the subject. I can’t promise that my tutorial will be “good”, but I’ll show you what I did.
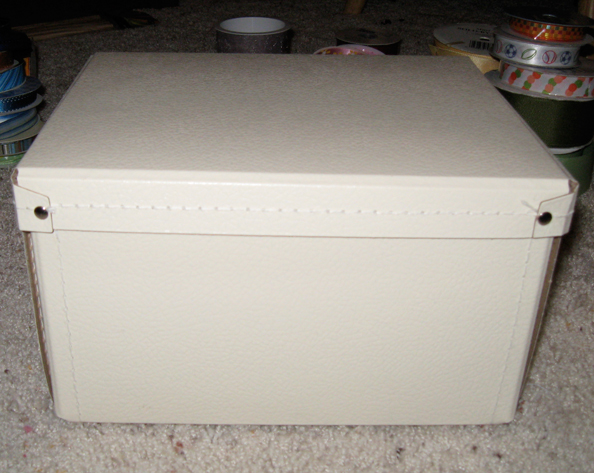
The first big problem is to find a good sturdy box that will accomodate a good number of ribbon spools I ended
up buying two of these (plus a smaller version of the same box) from IKEA. The great thing about them is that they are sold in packages of two, and they require assembly. Yep, you heard me right, I *LIKE* – in this case – that they weren’t complete on shipment. Here’s why:
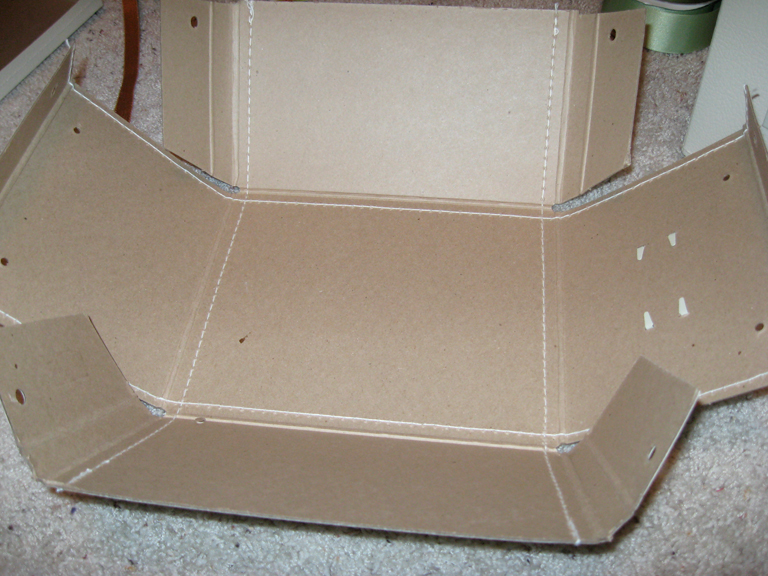 Because they are shipped flat, it’s much easier to mark the holes and insert the eyelets. But don’t let that discourage you. Any sturdy cardboard box would work.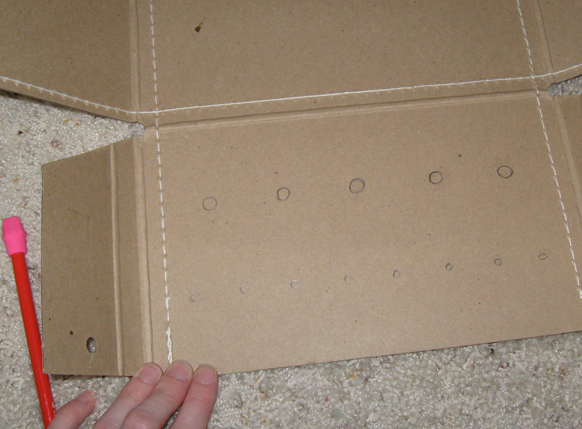
The first step is, then to mark where you want the holes. I found that because I could put two rows of ribbon in the box, that I wanted lots of holes to poke it through. So I created this layout. 5 large eyelets on the bottom row, and 8 smaller ones on the top. I just drew two horizontal lines where I wanted each row to be and then evenly spaced each hole. (On this go round, I just opened the box I had completed already and traced the holes locations.)
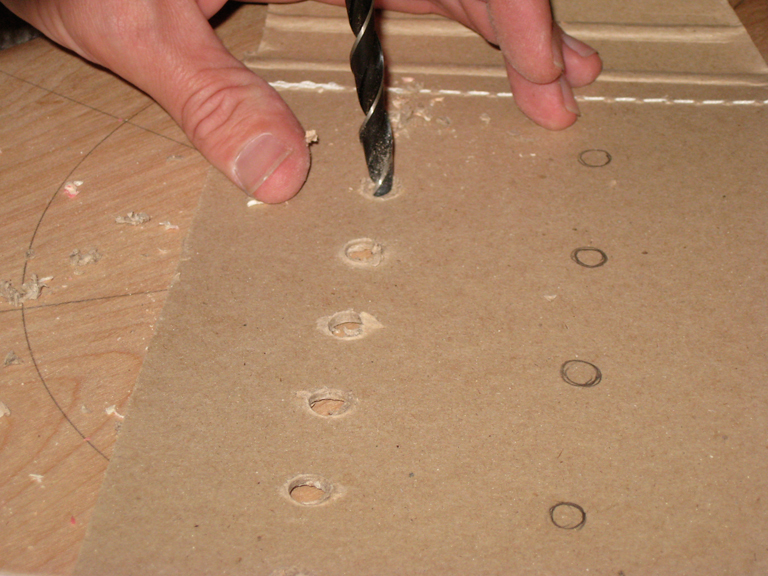 During my first attempt, I cut each hole by hand with an Exacto knife. That proved to be really hard as this is some seriously thick cardboard. So this time around, I asked my hubster to try using the drill. Ahhh… I saved the aching in my hands and ended up with much cleaner holes! Each hole he drilled was just a tiny bit bigger than the opening in the eyelet.
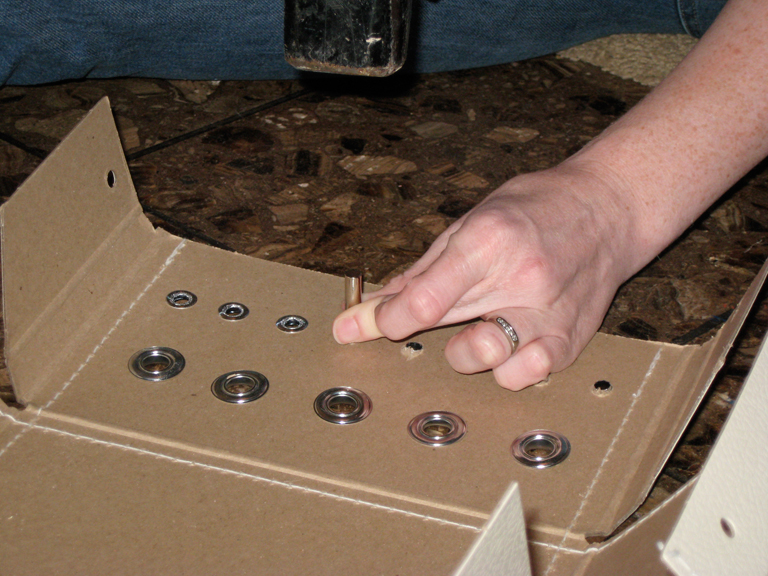 Next, just insert the eyelets. The large and small follow a similar process, but follow the instructions on your eyelet kits.
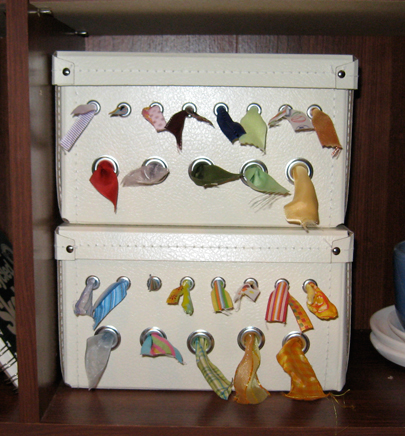 And voila! Your own neat ribbon storage! You can see that even with the extra holes I still needed to thread 2 ribbons through some. So far, that seems to be working ok. And it’s really easy to see what I have, and actually USE it because it’s easy to get to.
Now, does anyone know what to do with the little “bobbins of ribbon”? I have a million of those too!!!
Oct
15
The old and the new…
Filed Under Geeking, Painting, Selling, Sewing | Leave a Comment
Remember this painting? Well it’s been finished for a while, it’s even hanging in the hallway at home.

I love how the eyes turned out, and I love that it looks like Chris, but what the heck is that thing in the lower left corner? I mean, it’s not his neck, it’s like his face has been contorted into an odd shape. It’s not bugging me enough to take it down and redo it. :)
Here’s the newest attempt at painting. I’m going to hang it above the desk/sewing table in my sewing room. You know, the one I keep blabbing about, but never actually show you? Heh! Don’t look at the feet on this painting. Besides the fact that it’s not done, I was really struggling at getting color AND form right on the feet. It might just be that I need to paint on a huge scale. Part of my problem I’m sure, is that I like stiff stiff stiff brushes, and I only have one brush that is both tiny AND stiff.
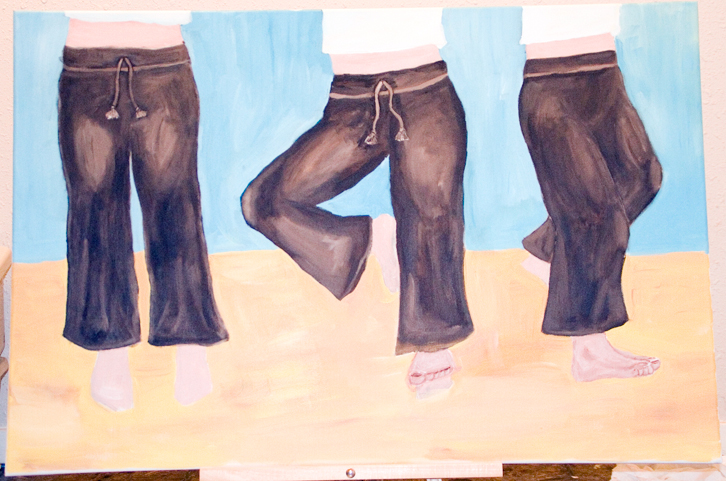
Anyway, maybe I’ll show the finished product some time in the next half century. You know, the same way I’ve been promising pictures of the sewing room all clean and shiny.
In other news, Etsy is having a costume contest and I’m going to enter the kid’s Shego costume. Judging by the entries I’ve seen, we should have this one in the bag. But that’s me getting too overconfident. I’m actually pretty sure I’ll hear nothing. Chris has even made these great green glowy light things for her hands to emulate Shego’s magic powers.
I have no idea how we will top this next year… And I hope we don’t have to, because this costume was a major PITA. I mean, I basically had to cut the body suit pattern apart and put it back together with the correct colors in the right places. At one point, the kitchen table was covered in butcher paper copies of the pattern so that we could cut them out with seam allowances intact (This because I am essentially stupid and would forget to cut out seam allowances).
So other than painting, cleaning and making costumes, I’ve been sewing black cats. I have sewed something like 8 black cats in the last week. (And sold them all in my Etsy shop) If I had more black felt, I’d make more cats, but I don’t. Oh darn!