Nov
17
Way, way, way back I showed you a baby quilt made from wonky star blocks. I said in that post that I would someday do a tutorial on how the blocks were made. I also mentioned that I ended up using two different techniques in the blocks for that quilt. So here is the first one, and I’ll post the second way in another post.
There are pros and cons to each way, so decide for yourself which way will work best for your quilt.
This is what I call “stack ‘n’ whack”. I’m not sure if this is actually what stack ‘n’ whack is, but to me it fits. So here goes.
I started with six 10″ square pieces of fabric. Though you can start with any size, and really any number of fabrics, but 6 offered a good variety in the finished product. Any more and you would probably have some fabrics that did not show up in every block, but that would be ok, too. Just remember that the finished squares will end up quite a bit smaller than what you start with. I started with 10″ blocks and ended up with 7.5″ blocks (though I could have trimmed them to 8″).
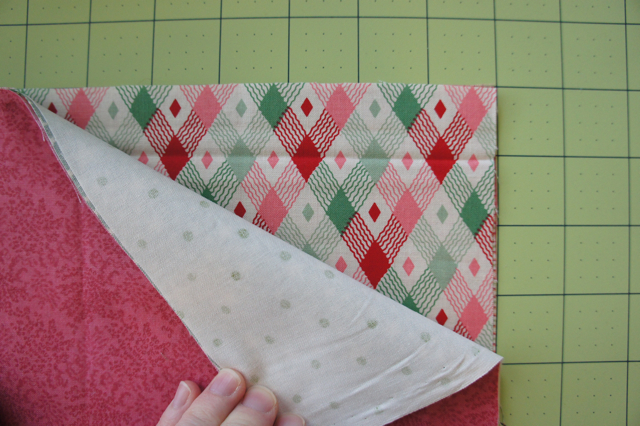
As you’re stacking your squares before cutting, make sure that if you have any directional prints that you have them in the orientation you want them to end up in in the final star (ie, right side up!). I had this diamond pattern that would work either way, but I wanted it “longways”.
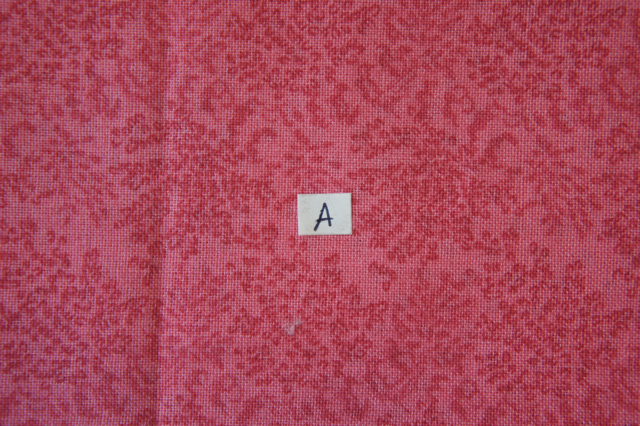
I also made tiny labels with the letters A-G so that I could keep my blocks in order (very important!) as I was sewing them together. I just stuck each label in the very center of the blocks before I started cutting. (That will end up being the center of the star, so no worries about cutting through it).
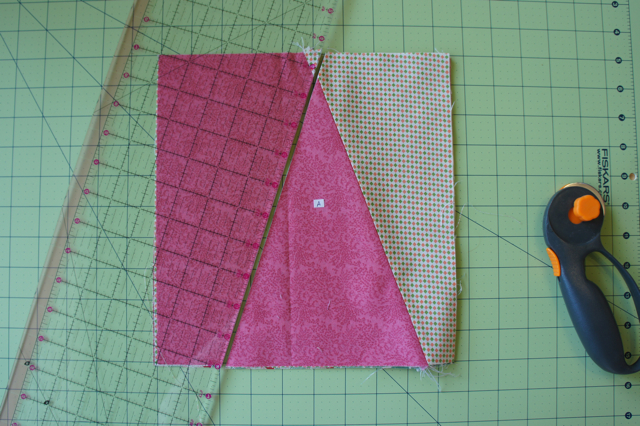
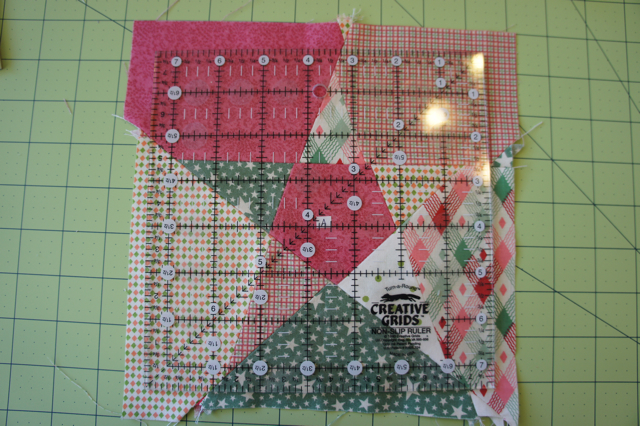
Ok, are you ready to start cutting? Because, there is no measuring or anything going on here. You just have to have the guts to cut with abandon! Lay your ruler across the fabric stack as shown below and give it a cut with your rotary cutter.
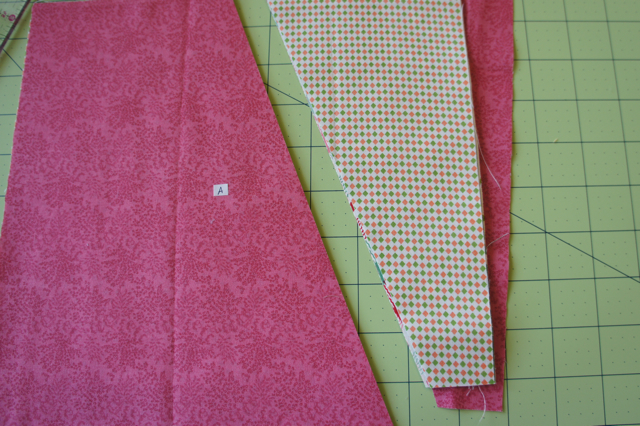
Next, take the top fabric from the unlabeled stack and place it on the bottom of that stack. Always restack the unlabeled stack throughout the process.
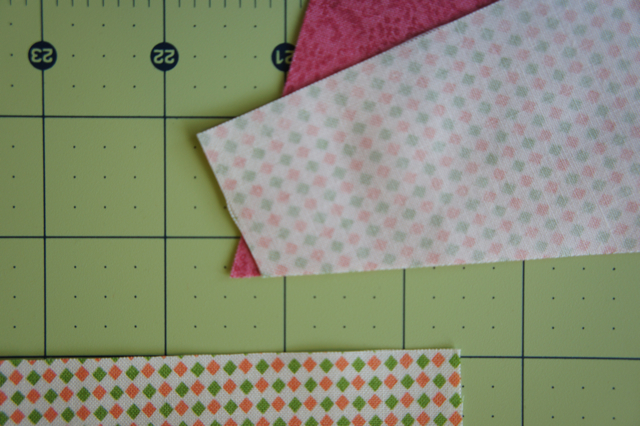
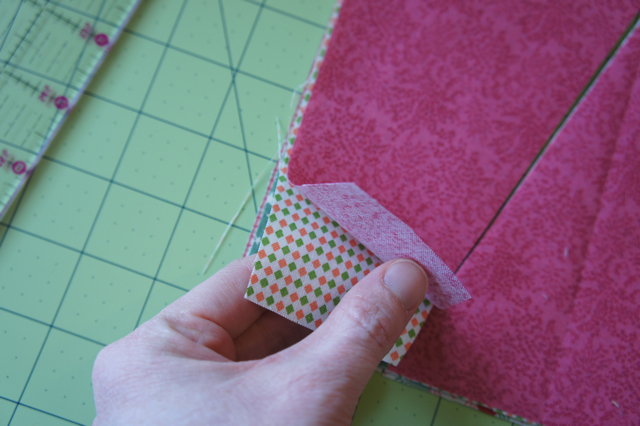
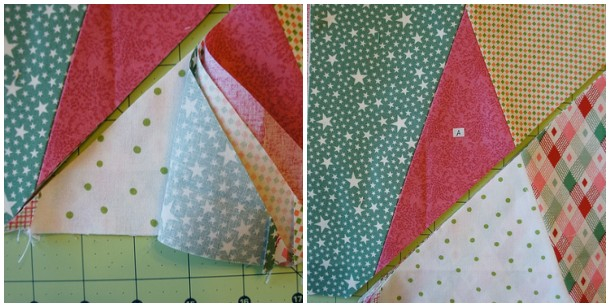
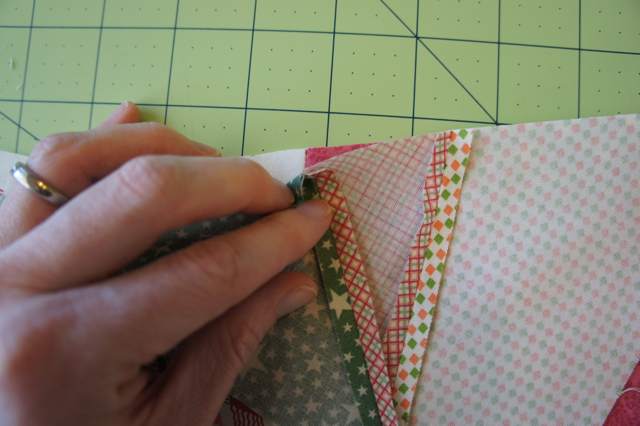
Now you’re going to sew these pieces all back together using a 1/4″ seam allowance. Make sure the pointy edges overlap the straight edges on each end by 1/4″ so that the edges of the block actually line up.
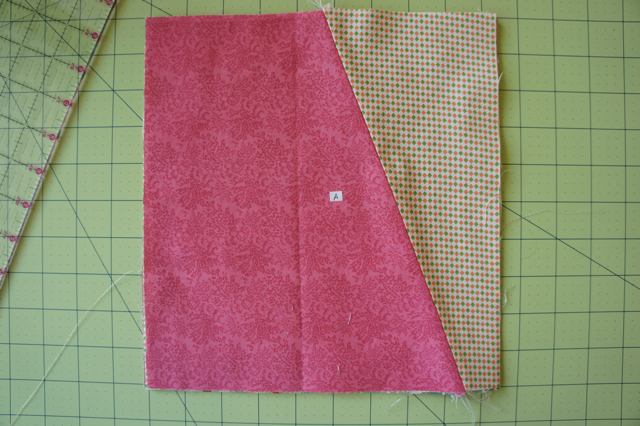
Sew a 1/4″ seam. I chain pieced all 6 of my blocks just because I loathe starting and stopping the machine.
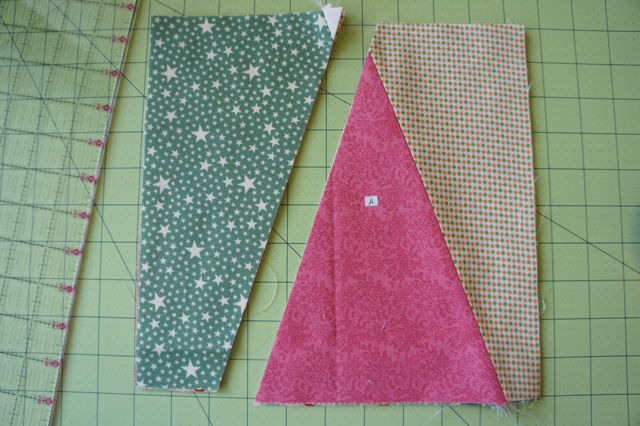
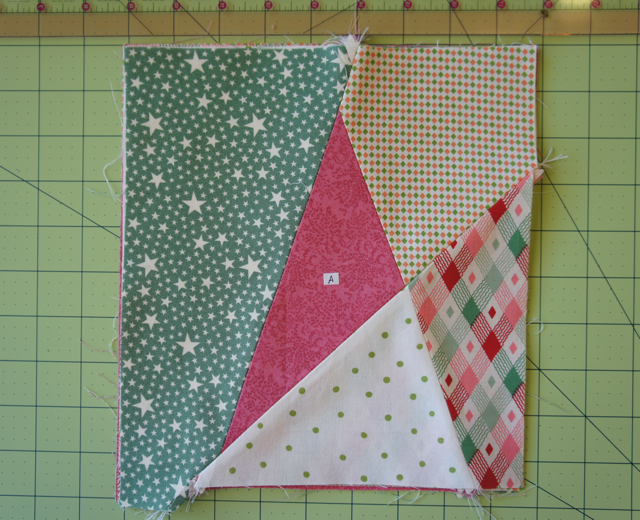
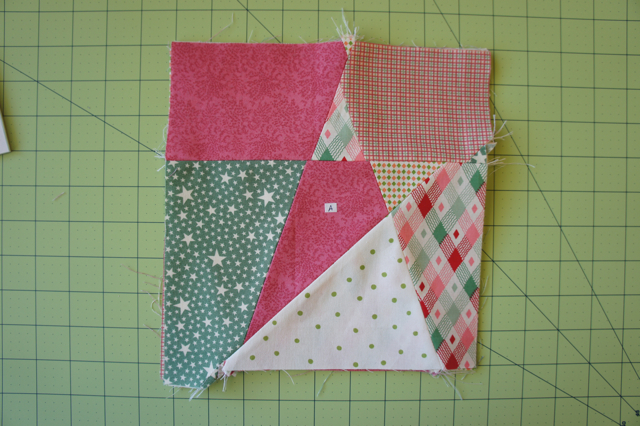
Press your seam and you have the block below. I pressed mine open because I think it makes things a little less bulky when we get down to seam numbers 4 and 5.
Restack your blocks in the correct order. After every seam restack your blocks according to your labels. If you don’t do that, I can’t guarantee that you won’t end up with the same fabric side by side in adjoining sections of the block.
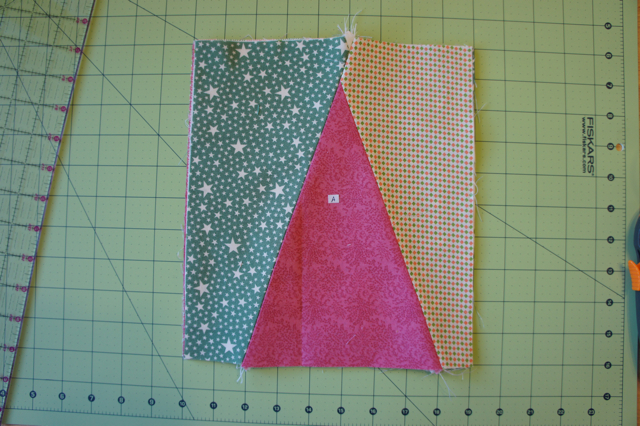
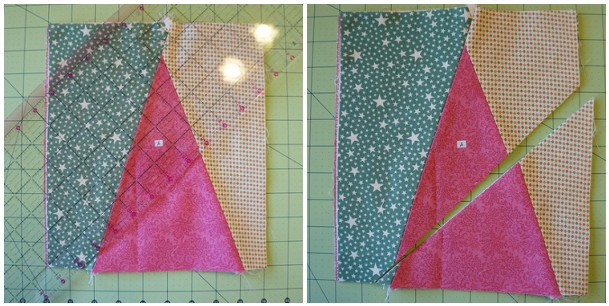
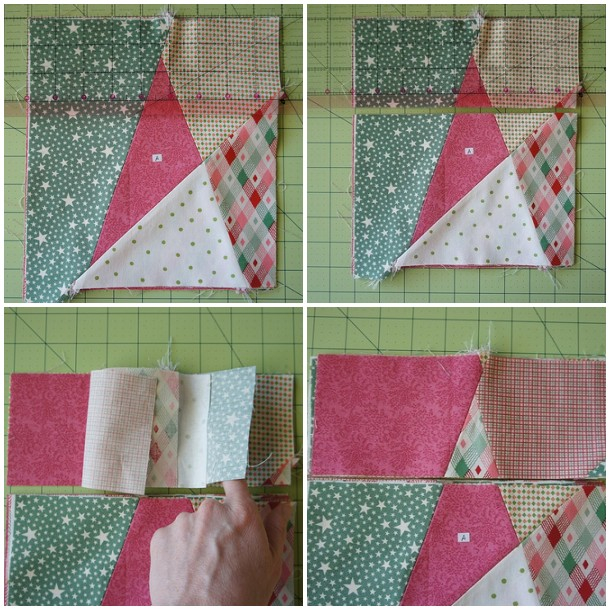
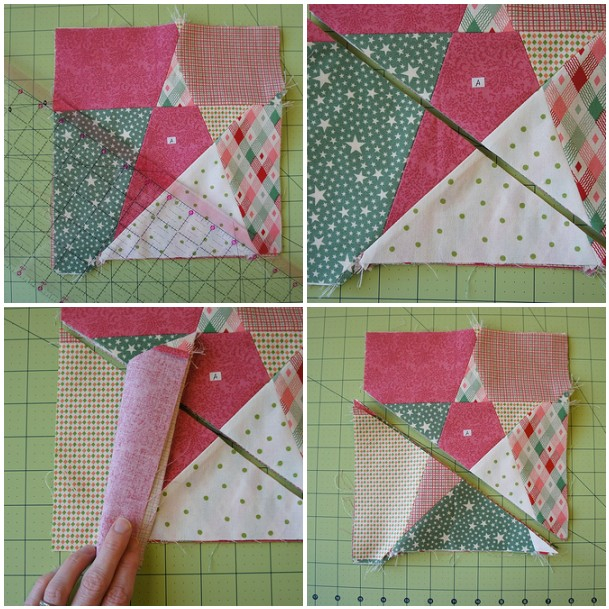
Still with me? Ok, cut number 2. I swear this will start looking like a star soon. Lay your ruler as below being sure to overlap the first seam at the top by about 1″. If you don’t do that, when you go to sew your final blocks together, the points will be in the seam allowance and will get chopped off.
This time, take the top two fabrics from the unlabeled stack and put them at the bottom of the pile.
Now sew them together the same way as the first set. Be sure to overlap the points on each end so that the edges line up.
Press. Restack.
Again, line the ruler up as shown below for cut number 3. Make sure that the ruler is overlapping by about 1″ on the “point edge” (in this case at the bottom). Cut. Aren’t you glad you have a rotary cutter?
Take the top three fabrics in the stack and move them to the bottom of the pile. Are you sensing a pattern here yet?
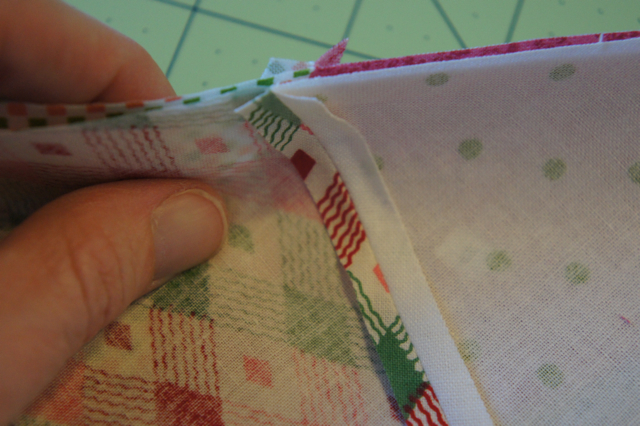
Again, sew. Make sure that the seams in the middle are overlapping by 1/4″ or so. This will throw the edges out of whack, but it makes the edges of the star’s point line up with its center.
Press. Restack.
As you can see, I didn’t have mine at a perfect 1/4″. The seams don’t line up perfectly. That’s ok with me. This method does not result in perfect stars. In fact, you can easily force it to be rather wonky just by changing the angle of the ruler on each cut.
You can also see on the lower left corner how out of whack the edges of the block got. Don’t worry about that, it will be taken care of by trimming at the end. But do try to keep the “out of whack-ness” in the same place on each block so that stacking is easier.
Alright. Make cut number 4 as shown below. This is the only cut that doesn’t end up on the bias. Again, make sure the ruler is overlapping the last seam by at least 1″.
Take the top four fabrics from the unlabeled stack and move them to the bottom of that pile. I know you guessed that before you had to read it didn’t you?
Can you guess what the next step is? Yeah. Sew them together. This time, line up the seams in the center with each other. There is no way to make them overlap on each side, and if you try one side the point will be off the center by about a half inch. The point itself is going to end up slightly narrower than the center.
Press. Restack.
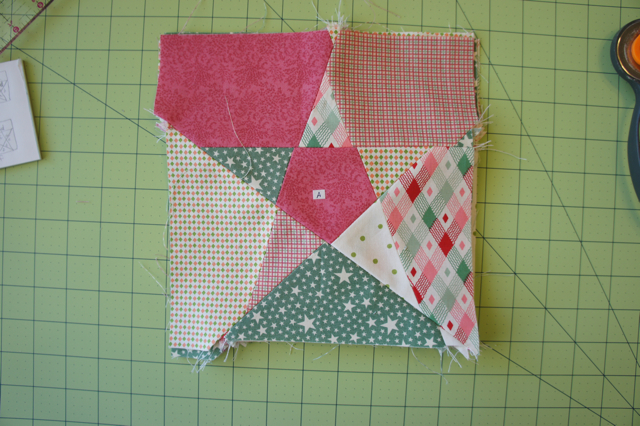
Starting to look like a star now! And we’re almost done. One last seam to go.
Lay the ruler across your stack and this time make sure that the seams at both ends are overlapped by about 1″. Cut. Now take the top five fabrics from the — yep you guessed it — unlabeled stack and move them to the bottom of the pile. Yes, this is the same as moving the bottom fabric to the top of the pile. So do it however you want to… :)
And sew. Again, making sure to align the seams in the center. Press and you have your almost finished blocks. All that is left is to remove all the raggedy edges and square up the blocks.
You’re going to want to trim enough off to remove the little bits of overlapped seams around the edges, or at least only present in the seam allowance so that they don’t show up in your finished quilt. Or maybe you don’t care… in that case just trim it up square.
Be sure to trim each block individually. They are all similar, but not identical and you don’t want to accidentally cut off points.
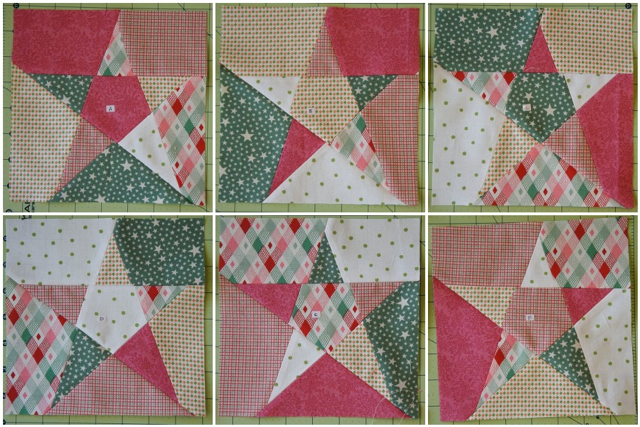
I chose to cut my blocks to 7.5″ because that’s how big my square ruler is. They easily could have been cut to 8″ or maybe even 8.5″ if I didn’t mind the little bits around the edges showing. Just make sure that there is at least a 1/4″ past the end of each point so that you don’t chop them off when sewing your blocks together.
So here they are! I think I’m going to use them (along with the blocks produced from the tutorial for the 2nd technique) to make a Christmasy table runner.
Remember I said that there are pros and cons to each technique. Here’s a little summary for this technique.
Pros
Not a whole bunch of tiny pieces to keep track of.
Random layout of fabrics in each block.
Only five seams per block.
Cons
Not a whole lot of control on how the fabrics are laid out for each block.
All blocks have to be sewn at the same time.
Finished blocks are smaller with this technique.
So what do you think? Clear as mud? I’d love to see your blocks if you decide to give this a go!

Comments
18 Responses to “Tutorial — 5 Point Star Quilt Block (Technique 1)”
Leave a Reply
You must be logged in to post a comment.






How cool is that! And you get six blocks all done at once.
Love the idea of making multiple blocks at one time!
What a fun block!
Fabulous tutorial!! Very well done, I love when lots of pics are included, so helpful. Thanks for linking up!
Great. Clear tutorial and wonderful idea. Thanks.
This look fantastic. thanks a bunch.
Great Love it
Great tutorial! searched the internet for the easiest way to do a 5 point star and you got my vote! Thanks for the help!
Oh I just love this. I would do it now but I have to go to work. Tomorrow for sure. Thank you thank you.
Love the star technique. thanks
Wow, what a clearly written and wonderfully photographed tutorial. I completely understand how to do this, thanks to your tute. Thank you! I find that I really want my star to be one color (scrappy) with a different colored background. Unfortunately, I can’t think of a combination of fabrics to use this way in which the stars don’t get sort of “lost.”
A+++ for excellent in tutorial writing though!
Ça me plait beaucoup !
J’ai bien envie d’essayer…
how would you recommend this if I want to make white stars with a solid color background? Would that be possible with this wack&stack, or should I try something else?
Christine, have you tried to make solid white stars with this technique? I suppose if you where very patient, it could be done. I would involve a lot of seam ripping, so I probably won’t do that! Have you tried Betsy Ross’ fold and cut technique for creating a five pointed star from one piece of fabric? I’ve tried it on paper, and I’ve been pretty happy with the results. I haven’t tried it yet on fabric.
I was hoping someone could tell me what size cuts of fabric to start with if I want a 15″ finished quilt block. If 10″ starting pieces end up 7.5″, I dont know if the inches “lost” would be consistent or variable. Theoretically, I’d need to start with fabric anywhere from 22.5″ to 30″.
Has anyone tried making a bigger block? How did your numbers work?
I’m so glad to find this!!! I had a pattern and made baby quilts quite a while ago. I cannot find my pattern and have been looking for this. Thanks
Love your tutorials! I’ve featured both of them on my blog today along with other Stack and Whack tutorials.
I usually do not comment but I have to tell you that I love making these blocks. So much fun! Thanks for sharing! Have a great day!